
Onar Alili
Engineer
6 minutes to read
Troubleshooting Gravity Forms Not Sending Email Notifications

Why you’re not getting emails?
You’re not alone if you’re NOT receiving email notifications from your Gravity Forms on your website. The plugin uses the built-in wp_mail function to send your email notifications. Unfortunately, many hosting providers don’t configure this properly, leading to emails being marked as spam or not delivered at all. To solve this, start using an SMTP plugin with a third-party email delivery service. An SMTP plugin connects your WordPress site to a dedicated email service, significantly increasing the chances that your emails will reach their intended recipients. Here are some improvements you’ll see after switching to an SMTP plugin:
- Why you’re not getting emails?
- How to fix it?
- Setting up a Postmark account
- Setting up an SMTP plugin
- Setting up a spam filter
- Final thoughts
How to fix it?
I’ll keep this section brief. To resolve the issue of Gravity Forms not sending email notifications, you need to get these 3 things right:
- Use an email delivery service (e.g., Postmark)
- Implement an SMTP plugin (e.g., WP Mail SMTP, Gravity SMTP)
- Set up spam protection (e.g., OOPSpam)
When combined, these solutions will ensure you receive an email notification in your inbox for each legitimate (non-spam) form submission.
Setting up a Postmark account
To start using an SMTP plugin, you have several options:
- WP Mail SMTP
- FluentSMTP
- Easy WP SMTP
- Gravity SMTP (available for Gravity customers only)
These popular solutions offer similar functionality and support top email delivery services. We’ll use Postmark with WP Mail SMTP as an example, but the configuration is similar for other SMTP plugins and email delivery services. Here’s the basic setup to start receiving emails from your forms:
- Register for a Postmark account
- Add and verify your domain in your account
- Set up DKIM, SPF, and DMARC
- Copy your Server API Token (we’ll use this in the SMTP plugin)
- Done!
For detailed instructions, check out the official Postmark’s step-by-step article and how to get Server API Token in your Postmark account.
Setting up an SMTP plugin
Recently, the company behind Gravity Forms released a new SMTP plugin called Gravity SMTP. There is an official guide on how to use Gravity SMTP with Gravity Forms. In this post, I will use WP Mail SMTP instead of Gravity SMTP.
Setting up WP Mail SMTP with Postmark is straightforward. WP Mail SMTP provides a detailed article on how to achieve this step-by-step. Here’s a quick guide to configure it:
-
Install WP Mail SMTP and click “Get Started” to begin configuring the plugin.

-
Select Postmark as your email delivery service in the next step. You can choose a different service depending on your budget and needs. We recommend Postmark based on our positive experience, but connecting any email service follows a similar process.

-
Paste your Server API Token from your Postmark account into the corresponding field in the next step.

That’s all there is to it. The final step will send a test email to your address. Be sure to also test by submitting a form to ensure everything is working correctly.
Setting up a spam filter
Now that you have a form with proper email notifications set up, it’s crucial to protect it from abuse and spam if you haven’t already implemented spam protection. Here are a few important reasons why you should take this seriously:
- Your Postmark account limit could be quickly reached due to spam submissions.
- Spam can lead to a higher bounce rate and more spam complaints for your Postmark account, potentially resulting in account suspension.
- Your domain’s reputation can be damaged, making it difficult for your emails to reach recipients’ inboxes, regardless of the email delivery service you use.
While Gravity Forms comes with built-in spam protection such as reCAPTCHA, hCAPTCHA, Turnstile, we will use OOPSpam Spam Protection for WordPress to view all form submission logs, including those that were filtered out as spam. The plugin captures these logs immediately after a visitor submits a form, before any emails are sent. This provides you with a comprehensive record of all submissions, helping you understand which ones didn’t trigger an email notification and why.

In addition, the plugin allows you to set up a filter to allow submissions only from certain countries and languages.


Here are a few steps to activate spam protection for Gravity Forms:
-
Subscribe to get an API key then copy-paste the API key to the plugin’s appropriate field under Settings->OOPSpam Anti-Spam on your WordPress Admin Dashboard.
ℹ️ Make sure to select OOPSpam Dashboard on the setting page
-
If you have Gravity Forms installed then a special section will appear on the OOPSpam Anti-Spam plugin’s settings page.

-
On this page, you need to activate the spam filtering for Gravity Forms by checking the Activate Spam Protection checkbox. You don’t have to do anything on your form. Once you activate spam protection on the OOPSpam plugin settings, you are good to go.
-
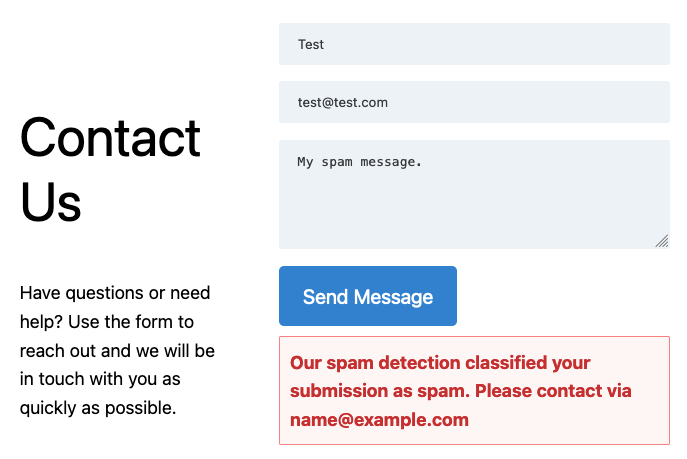
Don’t forget to enter a short message to display when a spam form entry is submitted. Your message will appear at the bottom of the message field.
Final thoughts
This is a common issue many form builder plugin users face. In this article, we went through how to set up a SMTP plugin and enable spam protection with logging functionality for Gravity Forms.
