
Chazie Baniquid
Technical Content Marketer
6 minutes to read
How to Block VPN and Data Center IP Submissions in WS Form
WS Form is a powerhouse when it comes to building complex, dynamic forms in WordPress. But no matter how advanced your setup is, spam can still sneak through—especially when bots are using VPNs and cloud-hosted servers to submit junk entries.
This guide will walk you through why blocking these traffic sources matters for WS Form, and show you two effective ways to do it—manually through Cloudflare or automatically using the OOPSpam plugin.
Why VPN and Cloud Provider IPs Are a Problem for WS Form Users
Spambots have gotten more sophisticated. They don’t just try to submit gibberish text anymore—they now:
- Use VPNs to hide their IPs and bypass country blocks
- Leverage proxies to rotate identities and stay undetected
- Operate through cloud platforms (like AWS, Google Cloud, Azure) to automate submissions across thousands of sites
These tactics let them bypass even some of WS Form’s built-in protections.
Blocking VPNs
Blocking VPN IPs stops spam from anonymized networks like Tor or commercial VPN providers. However, you’ll want to consider your audience—some legitimate users may also rely on VPNs for privacy or access.
Blocking Cloud Provider IPs
This is where you get the biggest impact. Most spam submissions don’t come from individuals—they come from data center IPs tied to bot servers. Blocking this traffic is generally safe and highly effective.
While most anti-spam tools look for behavior or content patterns, IP-based blocking proactively filters submissions before they even reach your WS Form.
Need help checking if an IP is from a VPN or data center? Use tools like IP Reputation Check to investigate.
Method 1: Block VPN and Cloud IPs Manually Using Cloudflare
If you’re running your WordPress site through Cloudflare, you can manually configure firewall rules to block traffic from known networks.
How It Works
Each network provider has an ASN (Autonomous System Number), a unique identifier you can use in Cloudflare to block all traffic from that network.
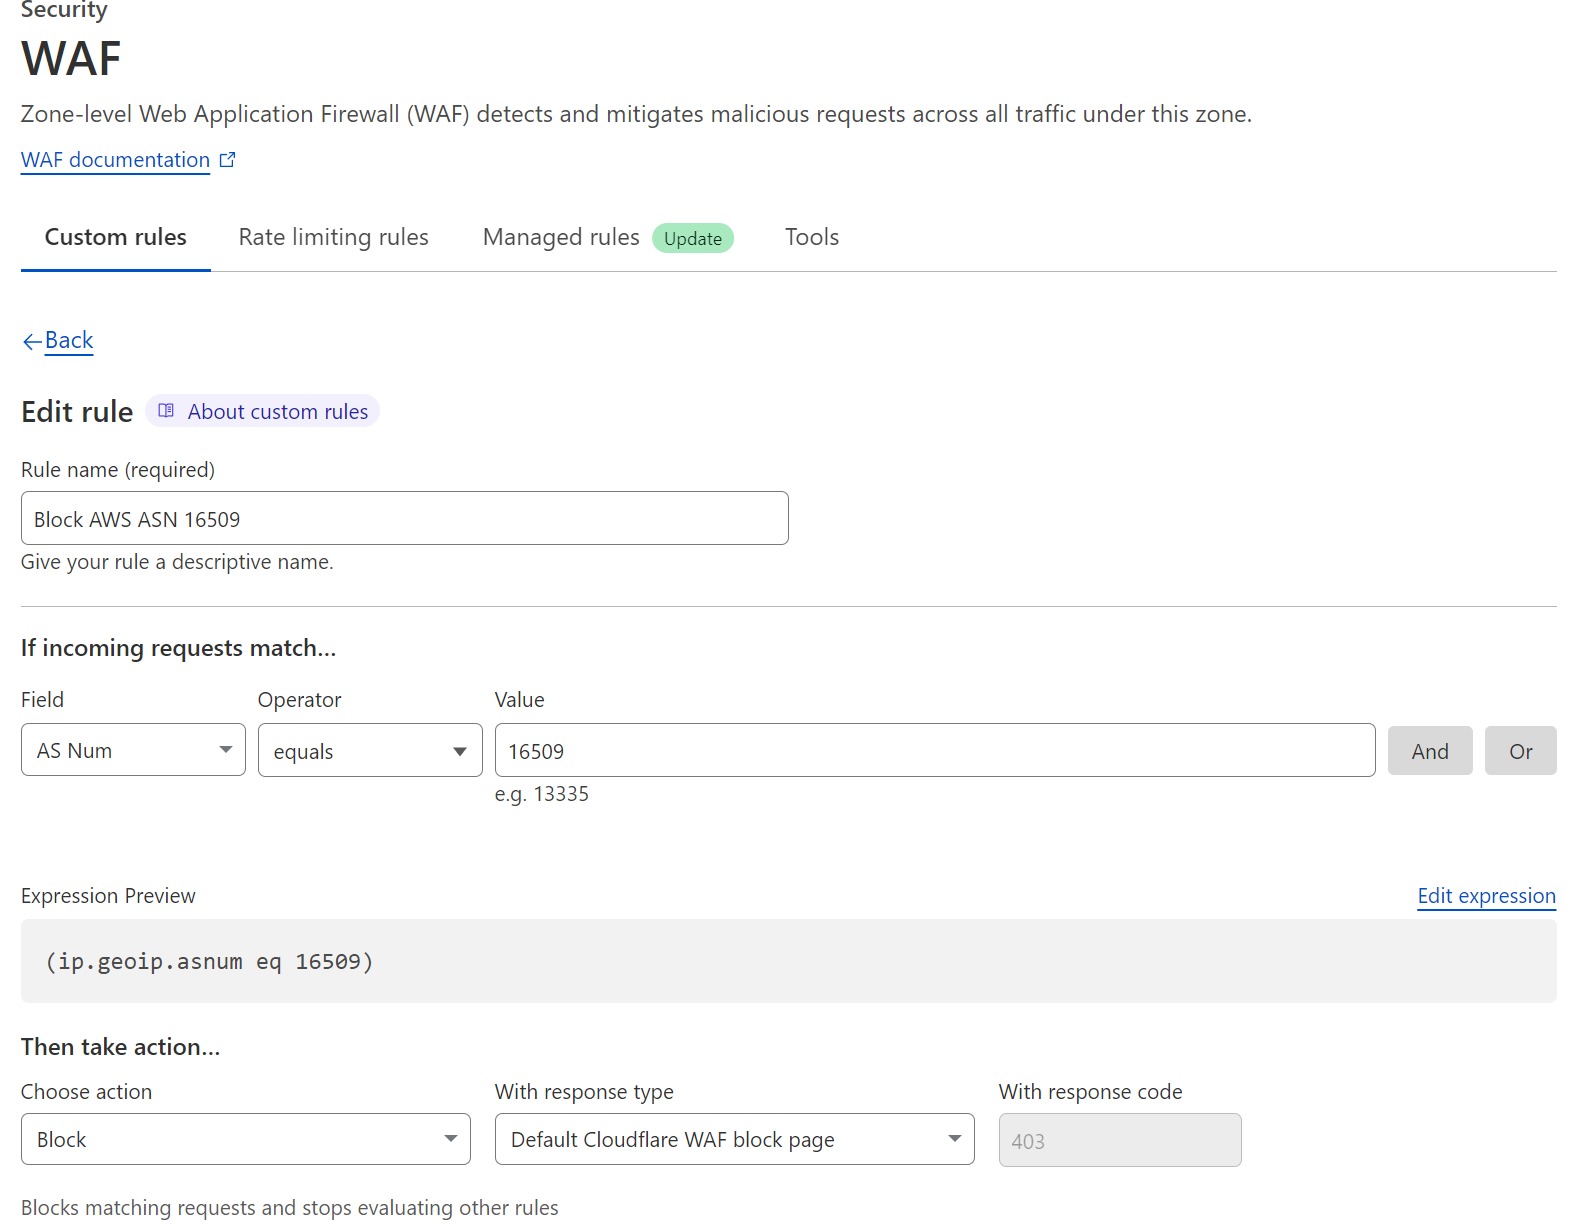
Example: If you discover repeated spam from DigitalOcean servers, you can block ASN AS14061 in your Cloudflare firewall settings.
What to Watch Out For
- Ongoing maintenance: ASNs and IP blocks change frequently
- Potential false positives: You could unintentionally block real users, especially business users on cloud-hosted systems
- Time-consuming setup: You’ll need to research ASNs, identify spam sources, and manually configure rules
This approach is powerful but best suited for technically advanced users managing large or high-risk websites.
Method 2: Automatically Block VPN and Cloud IPs in WS Form with OOPSpam
If you want something more automated and beginner-friendly, the OOPSpam WordPress plugin (that’s us 👋) is a fantastic solution. It works seamlessly with WS Form and only takes a few clicks to get started.
OOPSpam now includes two toggles under IP Filtering:
- Block VPNs
- Block Cloud Providers
Once these are enabled, the plugin filters out spam before it even reaches your WS Form entries.
Why OOPSpam Is an Ideal Match for WS Form
Unlike basic honeypot or CAPTCHA setups, OOPSpam connects to a real-time, constantly updated threat database that includes:
- IPs from over 2,000 cloud infrastructure providers
- Known VPN and proxy networks
- Threat signals and reputation scoring updated continuously
That means it not only stops known spam IPs, but also blocks emerging threats that haven’t yet made it to blocklists.
OOPSpam is lightweight, privacy-focused, and compatible with WS Form’s powerful features without affecting performance.
How to Enable VPN and Cloud IP Blocking in WS Form Using OOPSpam
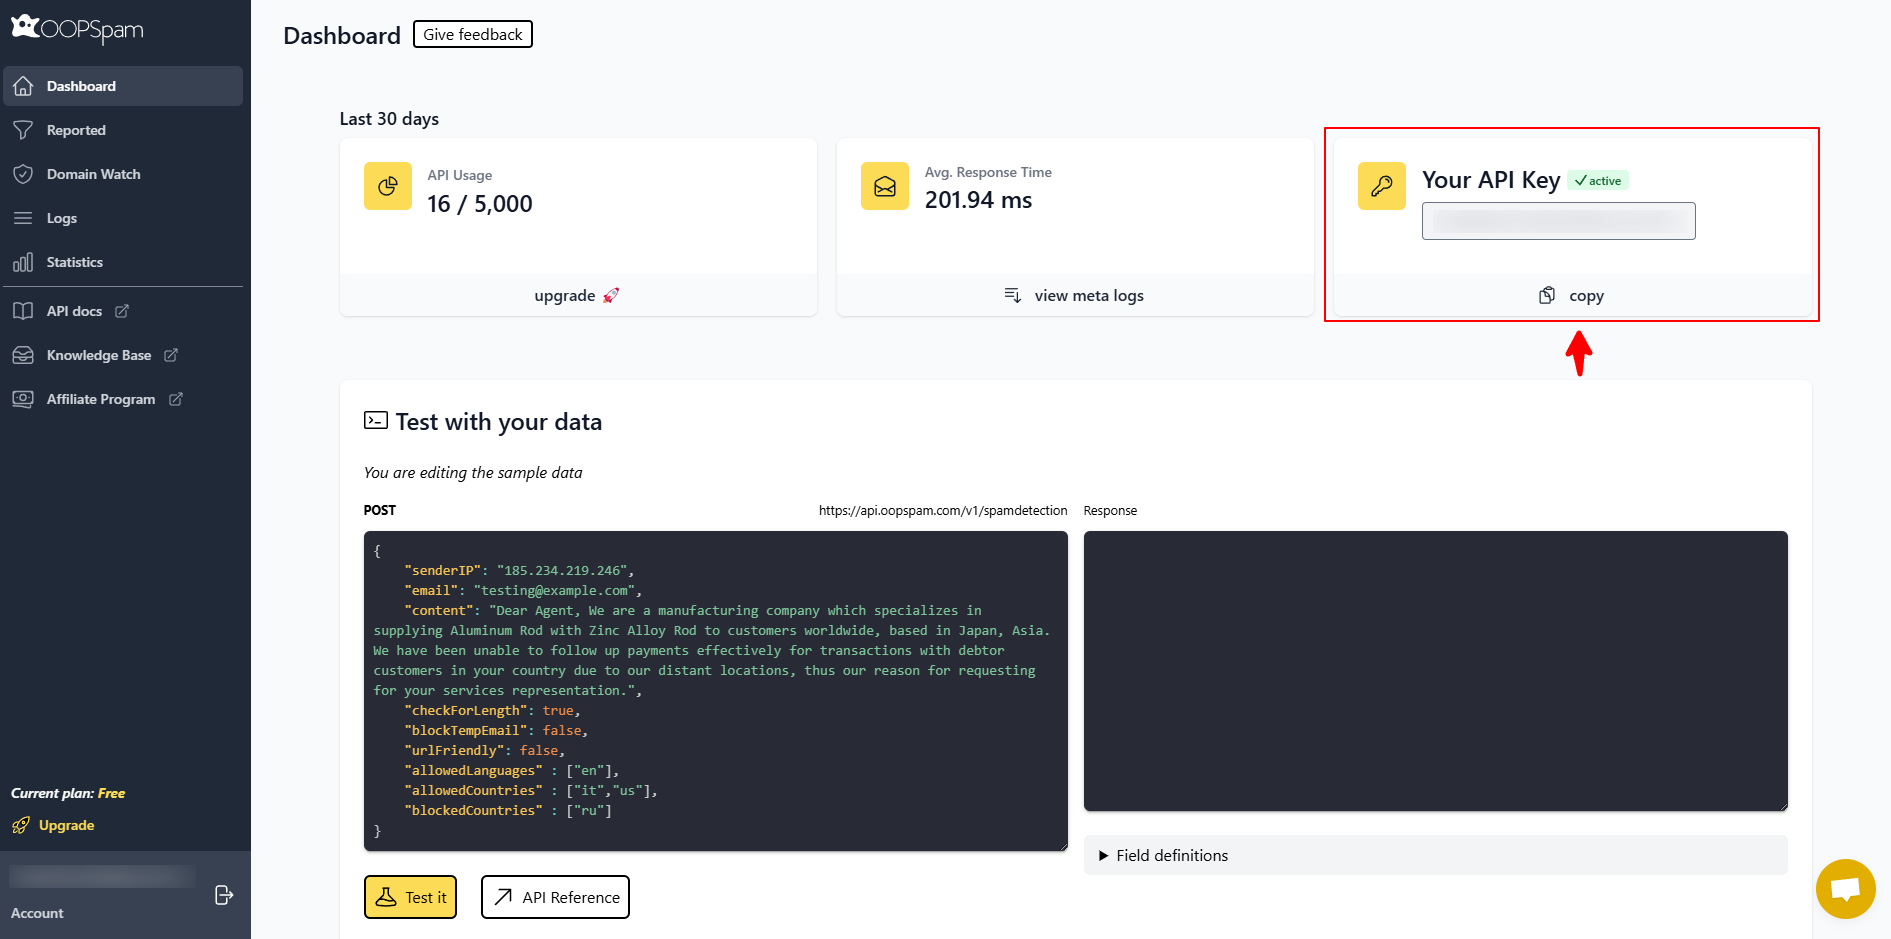
Step 1: Install the Plugin
- Go to your WordPress dashboard
- Navigate to Plugins > Add New
- Search for OOPSpam Anti-Spam, install and activate it
Then head over to OOPSpam Dashboard to create a free account and copy your API key.
Step 2: Connect Your API Key
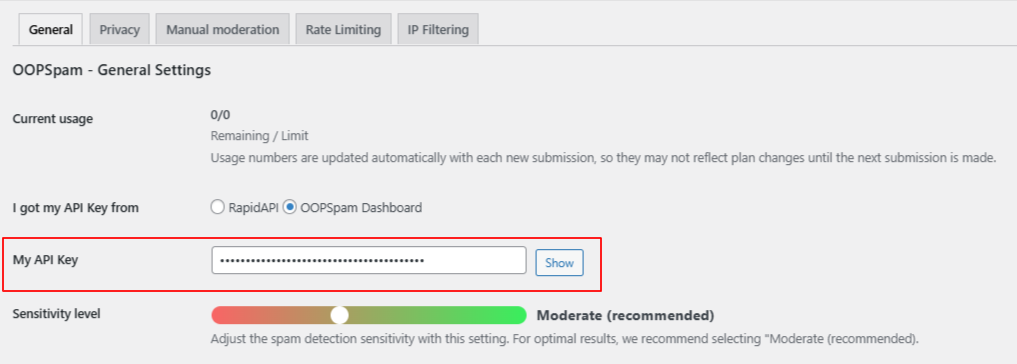
- Go to Settings > OOPSpam Anti-Spam
- In the General tab, choose OOPSpam Dashboard as your source
- Paste your API key into the My API Key field
Once WS Form is installed, spam protection settings will become available.

- Turn ON the Activate Spam Protection option to filter unwanted submissions.
- You can also write a message that will be shown when a submission is marked as spam.
Step 3: Enable IP Filtering
Switch to the IP Filtering tab and turn on:
- Block VPNs – Use with caution if you have international or privacy-conscious users
- Block Cloud Providers – Strongly recommended for eliminating bot-based spam
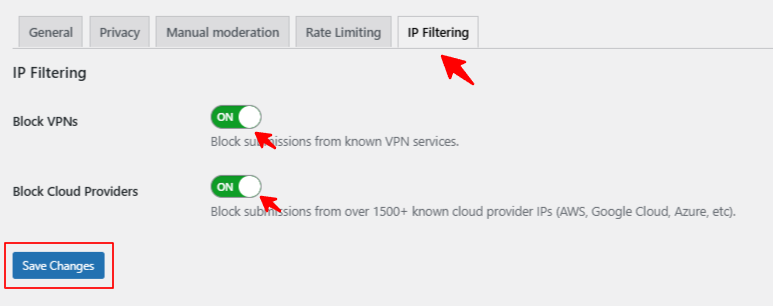
Click Save Changes and you’re all set. No additional WS Form configuration is needed—OOPSpam filters traffic automatically in the background.
Tips for Getting the Best Results with WS Form
- Check submissions regularly: Monitor your spam folder for false positives
- Layer your defenses: Use OOPSpam alongside WS Form’s own validation rules or custom logic
- Explore additional OOPSpam features:
-
-
Country-based filtering
-
Language-based blocking
-
Keyword-based spam scoring
-
These tools help you create a smarter, more targeted defense against spam.
Final Thoughts
WS Form gives you full control over form design and logic—but that power means little if your forms are getting hammered with junk submissions.
By blocking traffic from VPNs and cloud data centers, you shut down the most common entry points for spam—before it even hits your inbox. The OOPSpam plugin gives you this power with almost no setup time.
Whether you’re running contact forms, job applications, or eCommerce checkouts with WS Form, adding this extra layer of spam protection can save time, improve data quality, and help you focus on what matters.
Need help getting started? Reach out to our team—we’re here to support your setup and integration with WS Form or other supported form plugins like WooCommerce, Kadence Forms, and Gravity Forms.