
Chazie Baniquid
Technical Content Marketer
9 minutes to read
Stopping Spam Submissions in Google Forms with OOPSpam and Make
Spam submissions on your Google Forms can be a nightmare. Not only do they clutter your responses, but they can also distort your data, waste your time, and drain resources. If you’ve been dealing with spam submissions and wondering how to put a stop to them, you’re in the right place.
In this guide, we’ll walk you through the entire process of integrating Google Forms, OOPSpam, and Make to create an automated, spam-free workflow. Whether you’re a small business owner or a large organization, this solution will streamline your form submissions and let you focus on what matters most.
The Importance of Spam Prevention in Google Forms
Before we dive into the step-by-step setup, let’s first understand why spam prevention is critical for your Google Forms.
Why Spam Submissions Are Problematic
- Data Corruption: Spam submissions can skew analytics, making it hard to track accurate trends and insights.
- Lost Productivity: Manually sorting through submissions wastes valuable time and effort.
- Email Overload: If your forms trigger email notifications, spam submissions can flood your inbox, hiding legitimate responses.
How OOPSpam Solves the Problem
OOPSpam uses advanced machine-learning spam detection to identify and block malicious submissions before they reach your system. Its algorithms adapt over time, ensuring you stay ahead of evolving spam tactics.
Combined with Make, OOPSpam becomes a powerful automation tool that keeps your Google Forms free from spam.
Getting Started: What You’ll Need
Here’s what you’ll need to get started:
- A Google Form: Create a Google Form with fields like Name, Email, and Message.
- Make Account: Make is a no-code automation platform that connects different apps and services.
- OOPSpam Account: Sign up for OOPSpam to access its spam-checking capabilities and API key.
Let’s get started by setting up your form and accounts.
Step 1: Create and Test Your Google Form
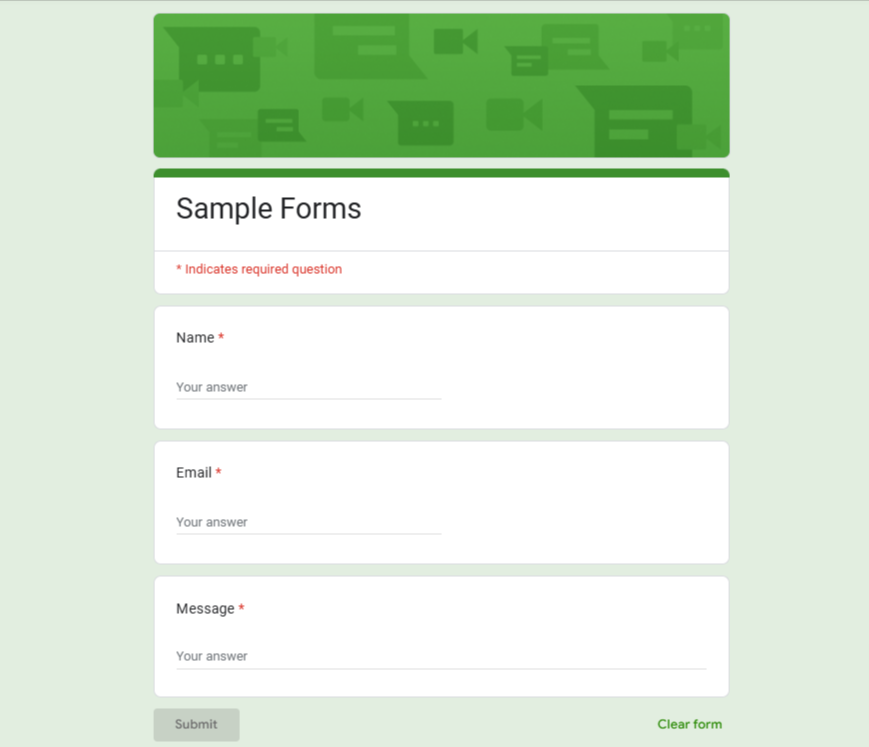
The first step is to ensure you have a functional Google Form to use in this process. Follow these steps:
1. Log into Google Forms
Visit Google Forms and create a new form.
2. Design Your Form
Add relevant fields such as:
- Name (Short answer)
- Email (Email format)
- Message (Paragraph or long answer)
3. Submit Test Responses
Add both legitimate and spammy responses to test the system later. Examples:
- Legitimate: “John Doe, john@example.com, Interested in your services.”
- Spam: “%%BUY NOW**, fake@spam.com, Win a million dollars!”
Step 2: Set Up Accounts for Make and OOPSpam
To integrate Google Forms with OOPSpam, you’ll need accounts on both Make and OOPSpam.
Create a Make Account
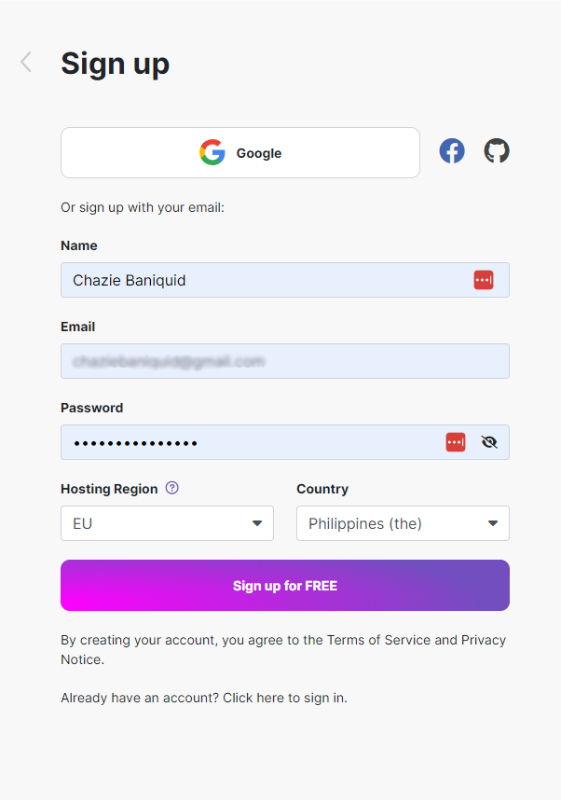
- Visit Make’s website and click Sign Up.
- Complete the registration process and log in to the Make dashboard.
Create an OOPSpam Account
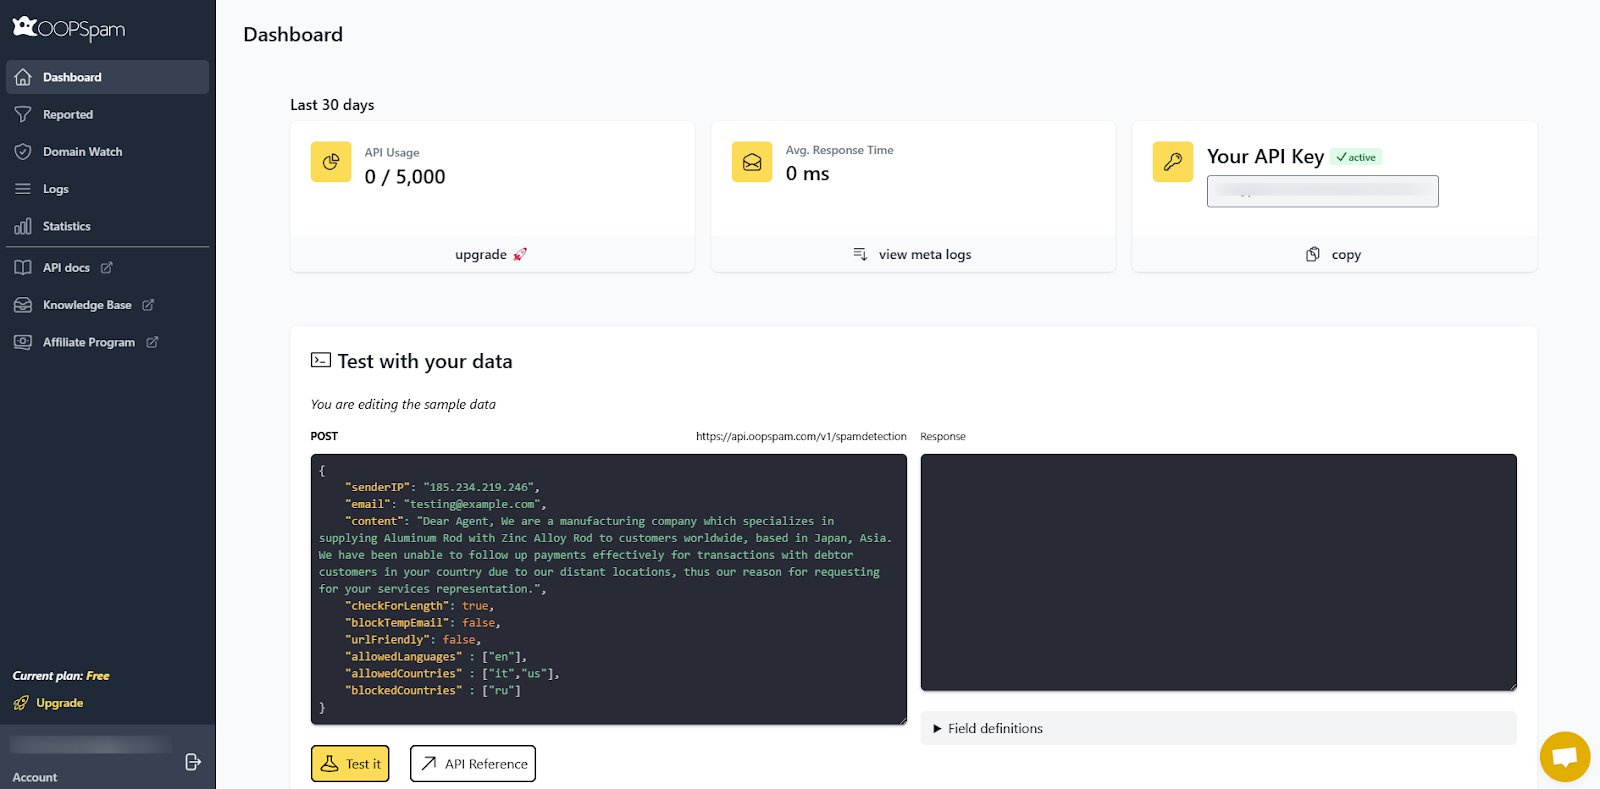
- Go to OOPSpam’s website and create an account.
- Once logged in, navigate to the Dashboard and copy your API Key. This key will allow Make to communicate with OOPSpam.
Step 3: Set Up the Workflow in Make
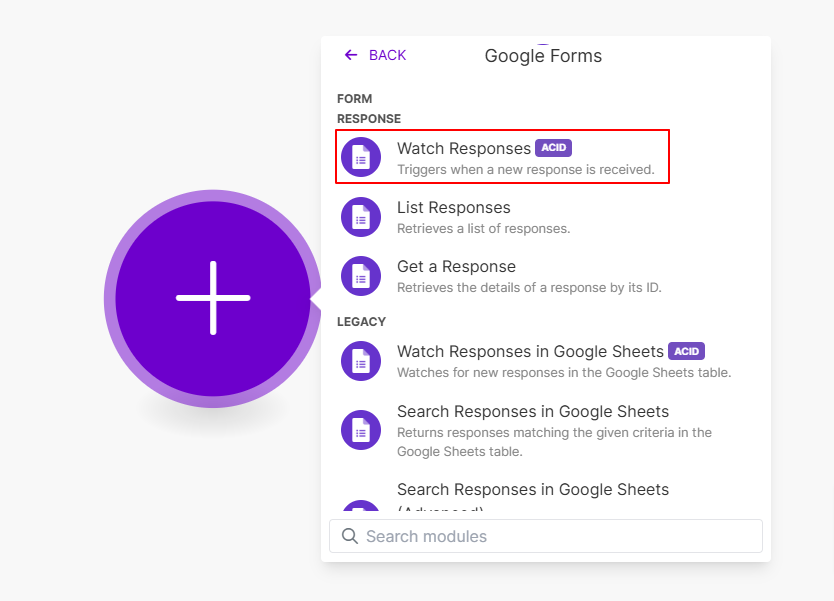
The next step involves creating the automation in Make. Here’s how:
Add the Google Forms Module
1. Start a New Scenario
Log in to Make and click Create a new scenario.
2. Search for Google Forms
Drag the Google Forms - Watch Responses module into the canvas.
3. Connect Google Forms
Link your Google account to Make and select the form you created.
4. Configure the Module
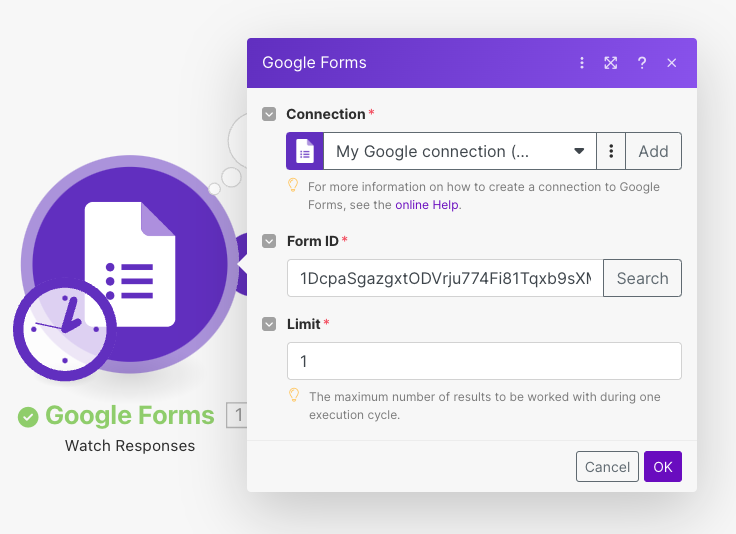
- Set the Limit to 1. This ensures the automation processes one submission at a time.
Add the OOPSpam Anti-Spam Module
1. Search for OOPSpam
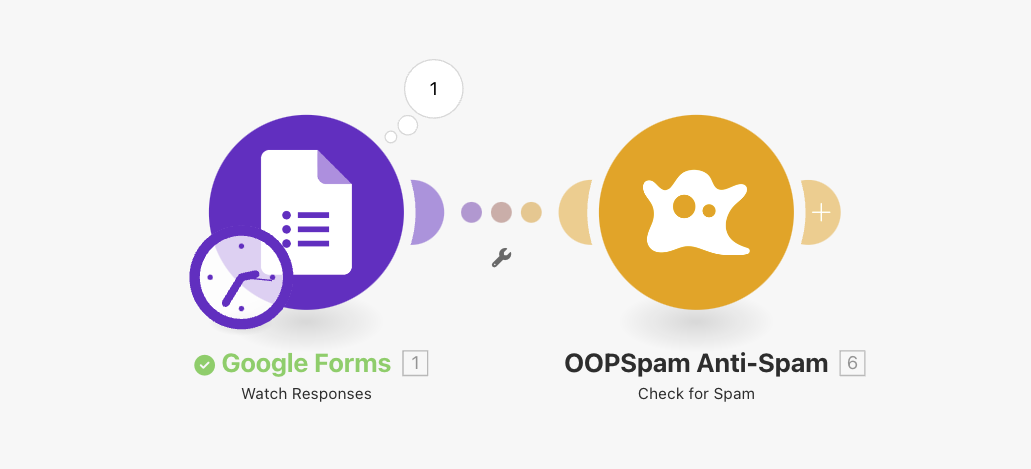
- Click the + icon in the scenario and select OOPSpam Anti-Spam.
2. Create a Connection
- Enter your API Key to connect OOPSpam with Make.
3. Map the Field
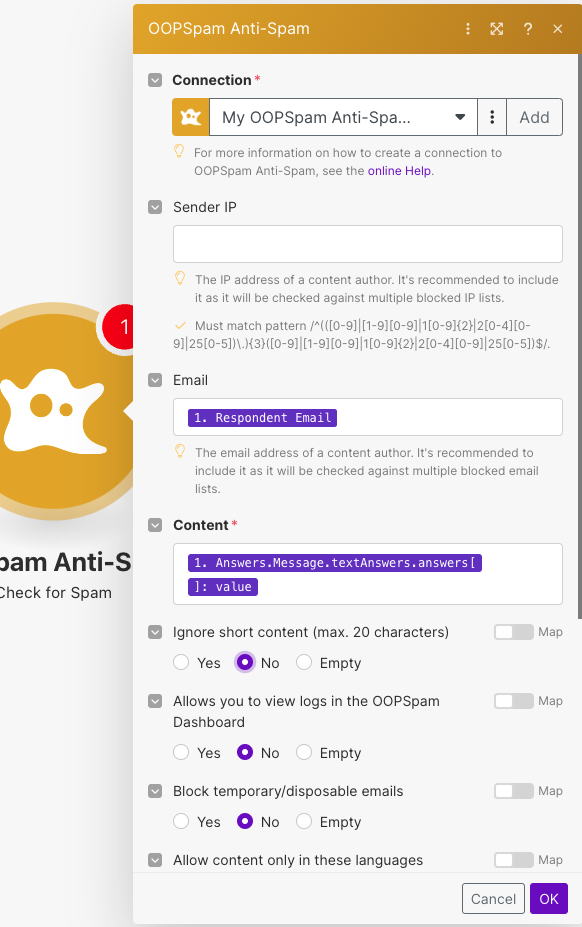
- Sender IP: Leave this blank (Google Forms doesn’t provide IP addresses).
- Email: Map this to the Respondent Email field.
- Content: Map this to the Message field (or the primary content field in your form).
📌 Advanced Settings
- Ignore Short Content: Set this to No. This ensures valid short submissions are not blocked.
- Logs in the OOPSpam Dashboard: Set this to No, unless you want to enable log viewing in your OOPSpam dashboard. Enabling this is optional and may help during testing.
- Block Disposable Emails: Enable this to prevent submissions using temporary email addresses.
- Language Filters: Use these to restrict submissions from specific languages.
Step 4: Handle Submissions with Conditions
Now that your Google Forms → OOPSpam flow is set up, it’s time to decide how to handle and store the processed submissions. This step ensures that legitimate submissions are stored in your desired application, while spam submissions are either logged for review or discarded.
Final Workflow Overview
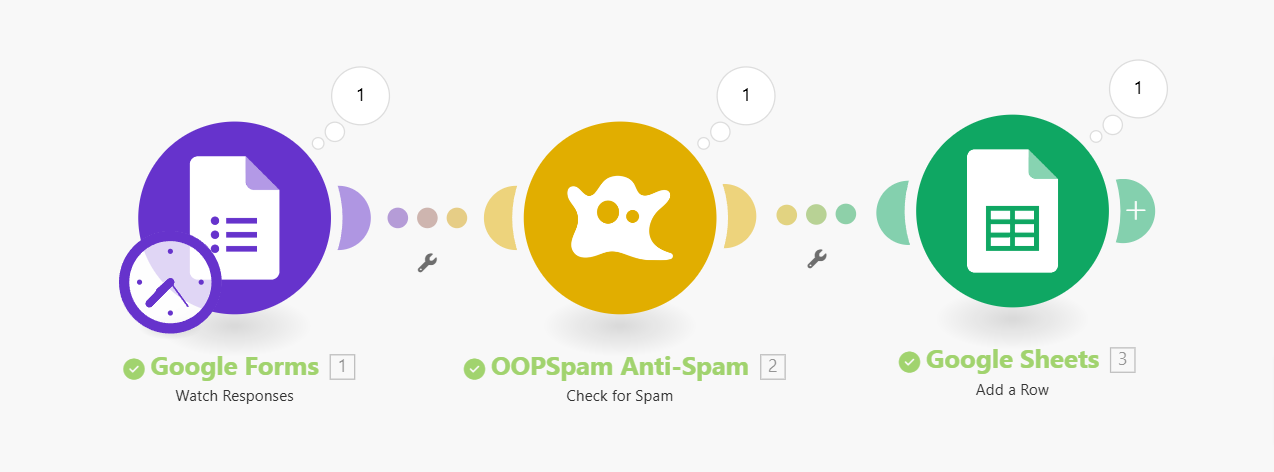
From the screenshot provided, the workflow has three key components:
- Google Forms: Captures responses from users.
- OOPSpam Anti-Spam: Filters out spam submissions based on a spam score.
- Google Sheets: Stores legitimate submissions in a spreadsheet.
This flow ensures seamless handling of form submissions, providing an organized way to store valid entries while dealing with spam efficiently.
Add Google Sheets as the Final Destination
- Add the Google Sheets - Add a Row module to your scenario.
- Link your Google account to Make and select an existing Google Sheet or create a new one to store your data.
- Map the output fields from the OOPSpam Anti-Spam module to the corresponding columns in your Google Sheet.
If you prefer to be alerted about new legitimate submissions, add an Email module as an alternative or alongside Google Sheets.
Spam Submission Handling
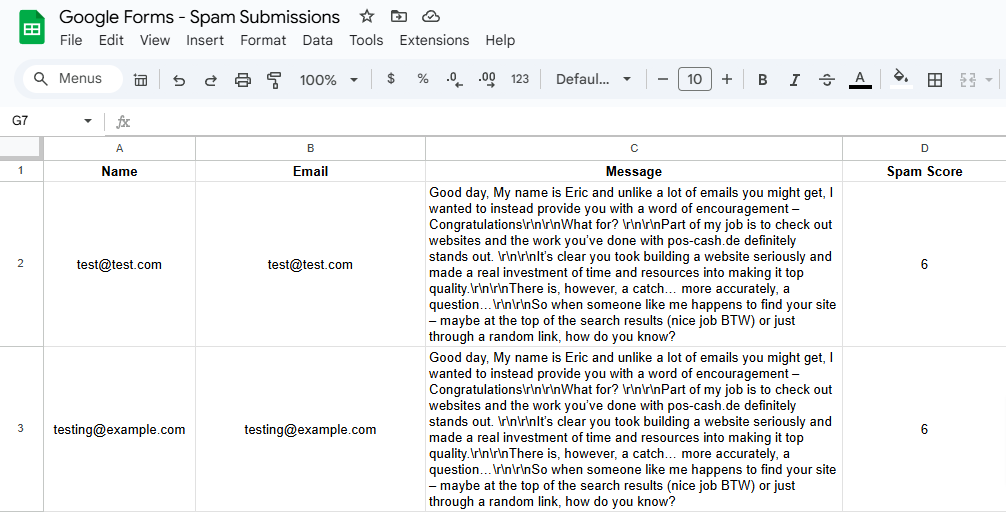
For spam submissions, you can choose to:
1. Log to Google Sheets
- Create a separate Google Sheet to store spam entries for later review.
- Map fields like Name, Email, Message, and Spam Score to the spam sheet.
2. Discard the Data
- Simply terminate the scenario for submissions where Spam Score > 2, ensuring they are not processed further.
Step 5: Test the Workflow
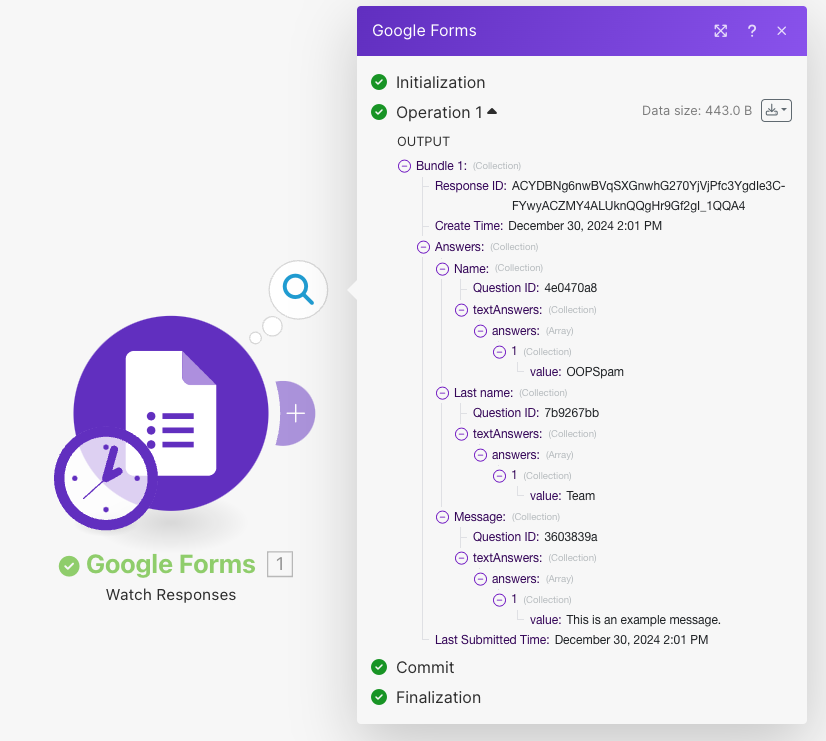
Testing ensures that the workflow runs smoothly and handles submissions as expected.
- Run the Scenario: In Make, click Run Once to manually test the workflow.
- Submit Test Forms: Use both spammy and legitimate test submissions.
-
Review Results:
- Check that:
- Spam submissions are flagged and handled appropriately.
- Legitimate submissions follow the correct path.
Step 6: Activate and Optimize the Scenario
Once testing is complete:
- Activate the Scenario: Click Activate to enable real-time automation.
- Monitor and Adjust: Periodically review the spam detection and tweak settings like spam score thresholds or filters for better results.
Optional Enhancements to the Workflow
Make allows you to add additional modules to customize the workflow further:
- Slack Notifications: Send alerts to a Slack channel for new legitimate submissions.
- CRM Integration: Automatically add legitimate submissions to your CRM system for seamless lead management.
These additions help tailor the workflow to your specific needs.
Final Thoughts
Stopping spam submissions in Google Forms doesn’t have to be a manual or tedious process. By combining the advanced spam detection capabilities of OOPSpam with the automation power of Make, you can create a system that’s efficient, reliable, and tailored to your needs.
This setup not only saves time but also ensures your data is clean and actionable. Whether you’re managing forms for lead generation, surveys, or event registrations, this workflow has you covered.
Have questions or need further assistance? Check out the documentation on OOPSpam’s website or reach out to our support team for expert help.
Start your journey to spam-free forms today with OOPSpam and Make!