
Chazie Baniquid
Technical Content Marketer
8 minutes to read
Stop Spam on Elementor Forms Using Make and OOPSpam

Managing a WordPress site with Elementor forms often means dealing with spam submissions that clutter your inbox and take up your time, making it harder to focus on real leads. To solve this, we’ll automate spam detection for Elementor forms using OOPSpam and Make, helping you streamline how form submissions are handled.
This guide will walk you through setting up OOPSpam’s Make App to block spam efficiently. If you prefer a simpler option, OOPSpam also offers a WordPress plugin to block spam without using Make.
Why You Need to Stop Spam Before It Starts
Spam is more than just an annoyance—it can have real consequences. Every fake form submission wastes valuable time filtering out nonsense from genuine leads. If you’re running email marketing or lead-gen campaigns, spam submissions can also skew your analytics, making it harder to measure real results.
OOPSpam offers advanced spam filtering with an AI-based system designed to learn and adapt over time, ensuring that most spam never even reaches your inbox. When combined with automation via Make’s integration, it creates a reliable and efficient solution.
Let’s dive into how to set this up from scratch.
Setting Up WordPress Locally with LocalWP
It’s best to test changes locally before applying them to a live website. Start by setting up WordPress on your computer using LocalWP. It’s free, easy to use, and gets you a local WordPress environment in minutes.
Note: If you already have a WordPress website with Elementor and want to get straight to the spam prevention process, you can skip this part.
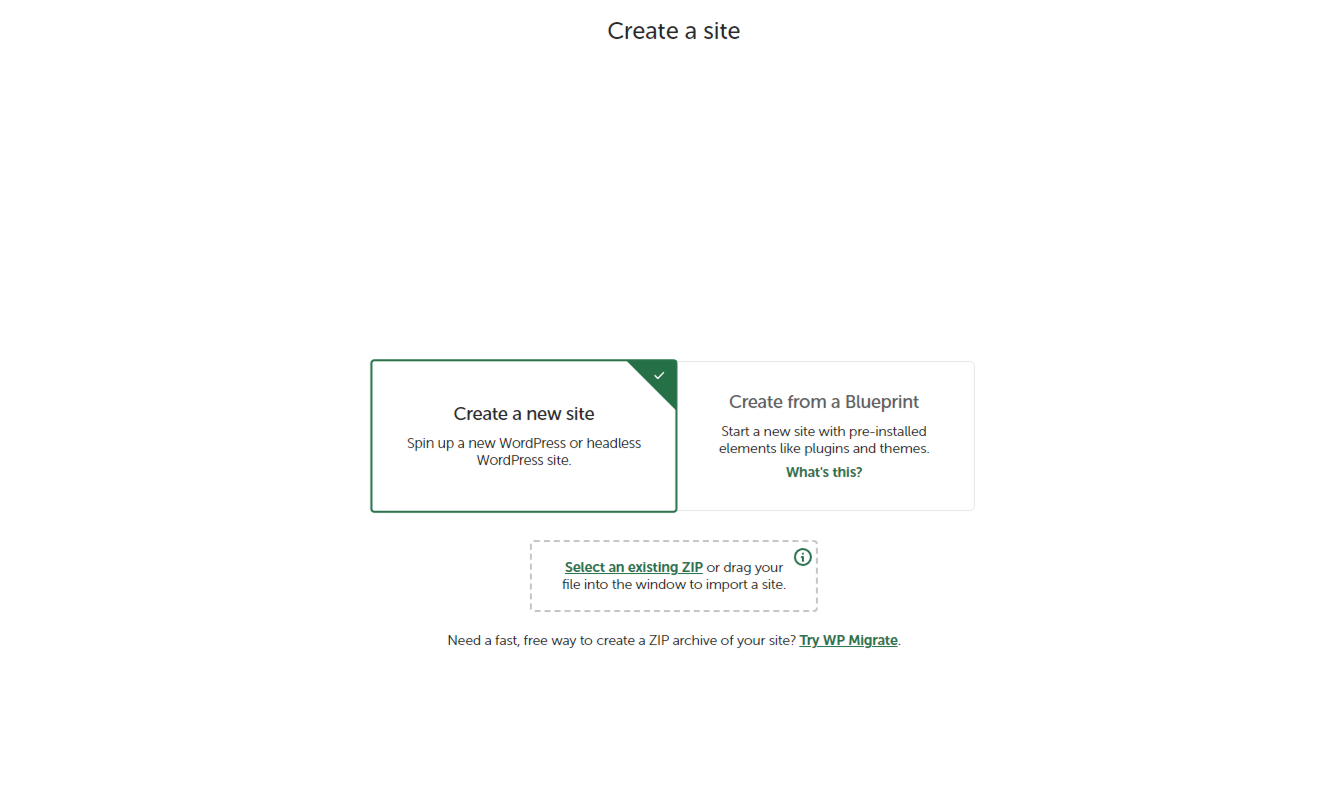
Here’s how to do it:
-
Go to LocalWP’s website and download the version for your operating system.
-
Follow the prompts to install it.
-
Launch LocalWP and click Create a New Site. Name the site (e.g., “Elementor Spam Prevention Test”).
-
Keep the default PHP and MySQL versions, and proceed through the setup steps.
In a few minutes, your local WordPress environment will be ready. LocalWP makes it easy to set up a site for testing purposes.
Installing Elementor Plugin
With WordPress running, the next step is to install Elementor.
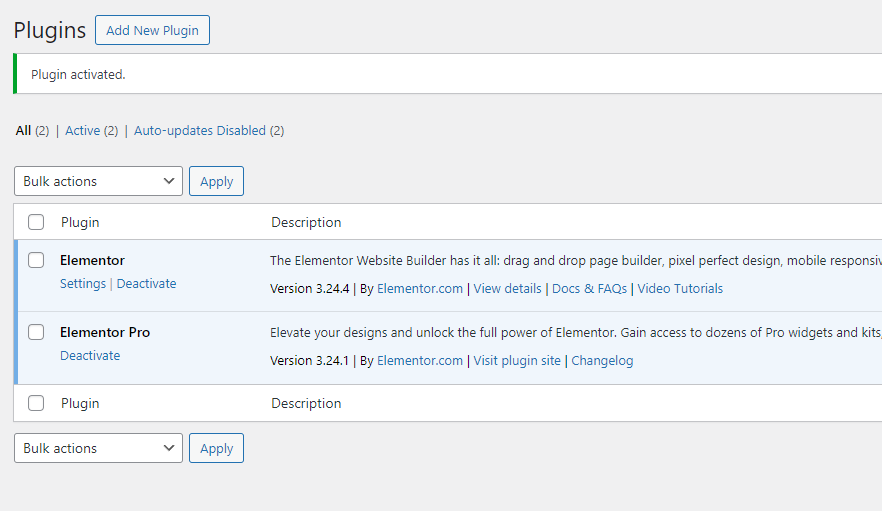
Log into the WordPress dashboard and go to Plugins > Add New. First, install the free Elementor plugin, then install Elementor Pro (required for Elementor Forms).
Note: To use Elementor Forms, the Pro version of Elementor is required, but you must install the free Elementor plugin first.
While this guide focuses on using OOPSpam’s Make App to stop spam, you can also use the OOPSpam WordPress plugin for a simpler setup. The plugin is available in the WordPress directory.
Creating the Elementor Form
To begin testing the spam detection, create a simple form:
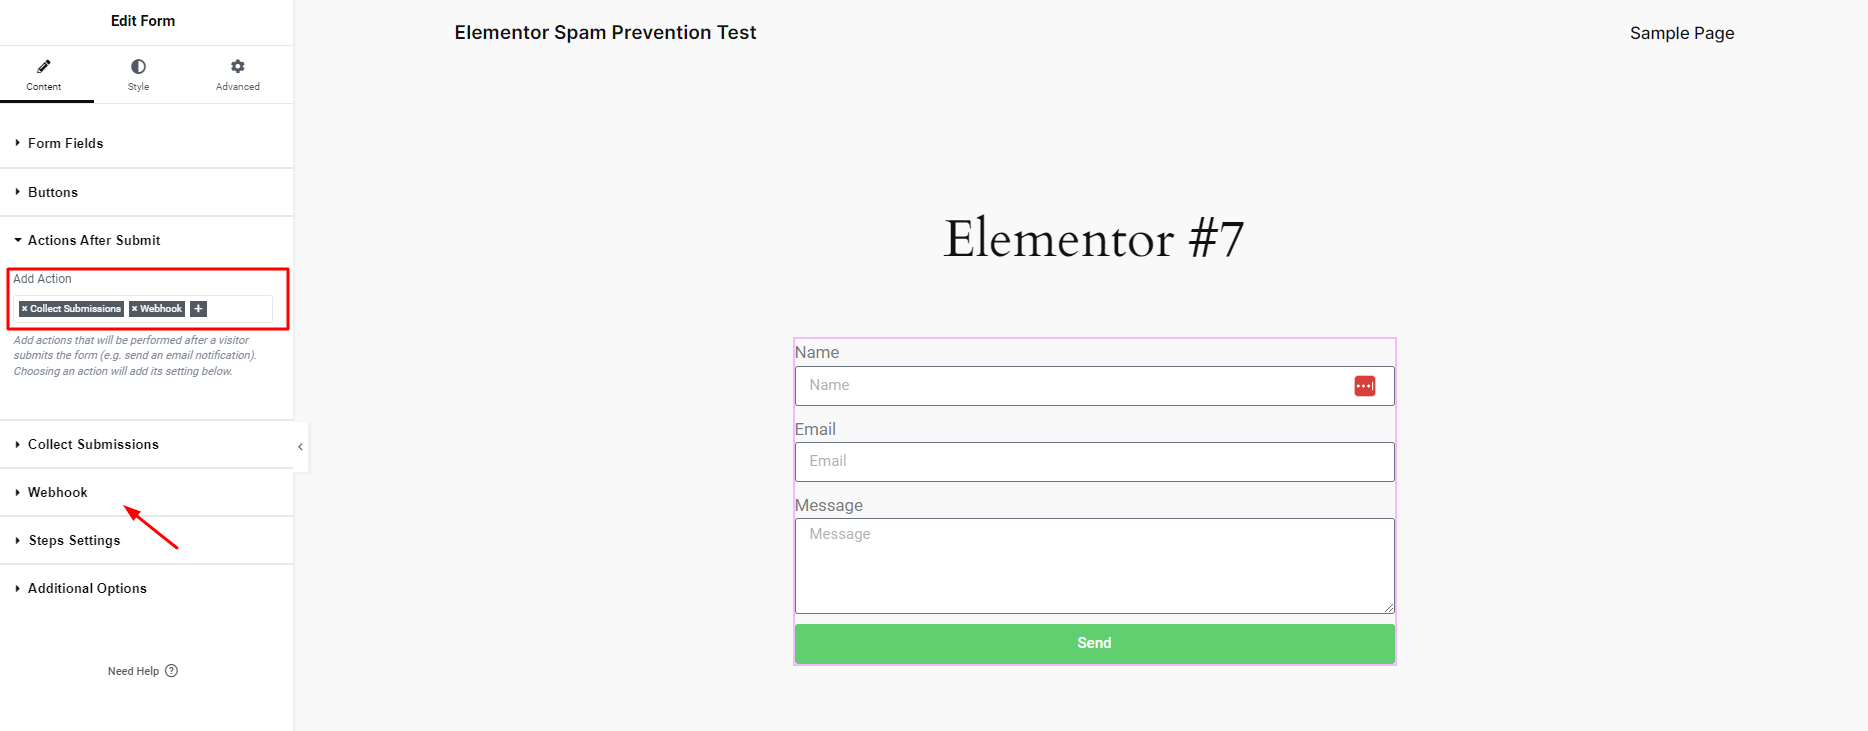
Create a new page in WordPress and edit it with Elementor.
Drag the Form widget onto the page and customize it to include fields for Name, Email, and Message. In the Actions After Submit section, select Webhook. This is essential as it will be used to send form data to Make.
Note: Remove Email from the Actions After Submit section to avoid receiving email notifications for spam submissions. If you still want email notifications for legitimate submissions, set them up in the Make scenario.
Publish the page to start receiving form submissions.
Setting Up Accounts on Make and OOPSpam
Before setting up the automation, ensure you have accounts on both Make and OOPSpam. The process is quick and easy.
Creating an Account on Make
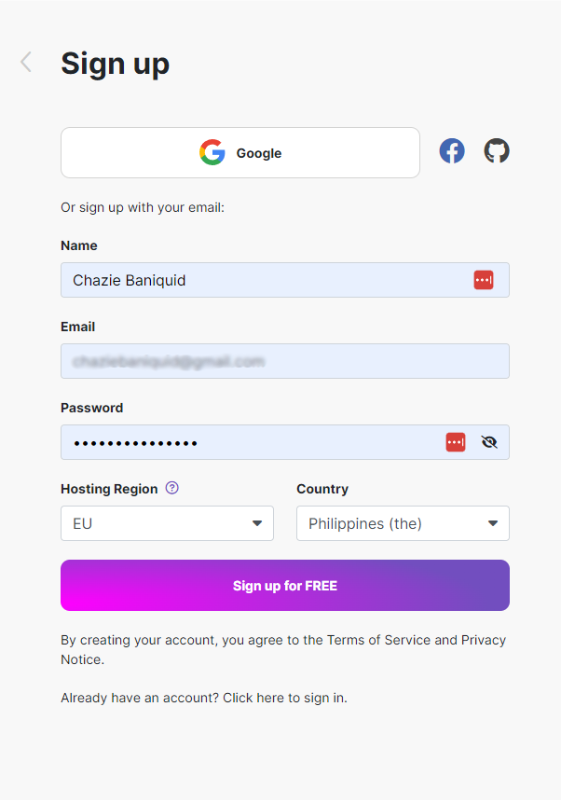
Go to Make’s website and click on Sign Up. Enter your email, create a password, verify your email address, and you’ll be directed to the Make dashboard.
Creating an Account on OOPSpam
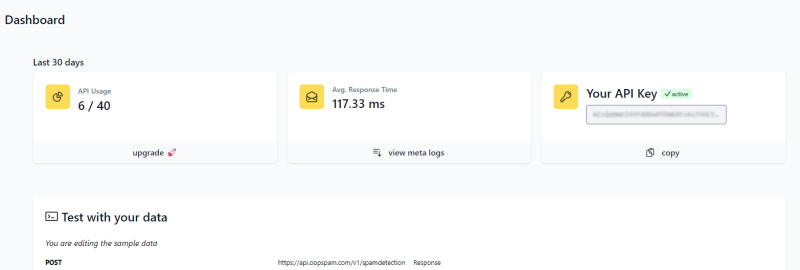
Go to OOPSpam’s website, click Sign Up, fill in your details, and log in to the dashboard.
Click on Copy under Your API Key to copy your OOPSpam API key.
Creating the Automation in Make
Once the accounts are ready, proceed to Make to set up the automation that will check form submissions for spam.
Setting up the Webhook
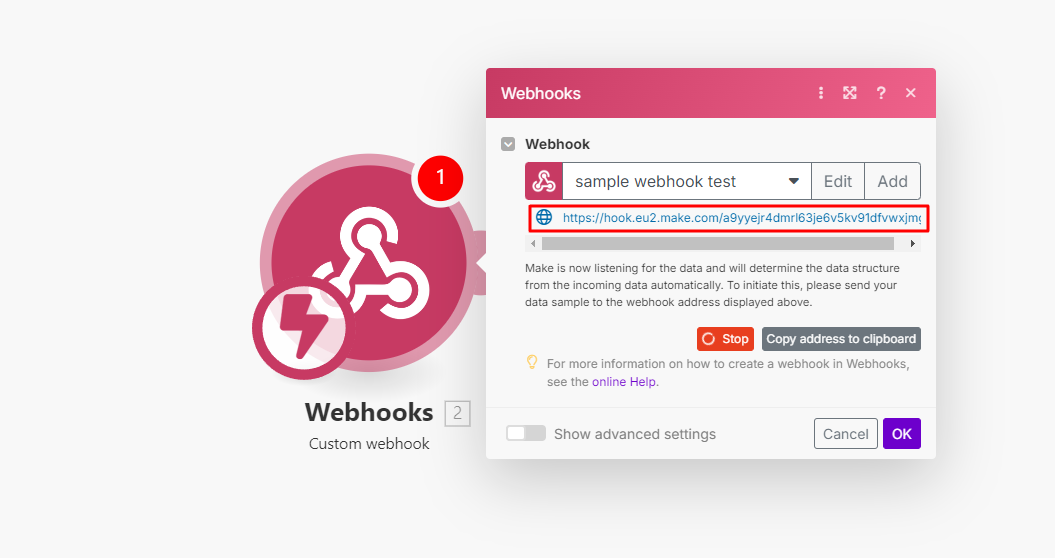
In Make, click Create a new scenario. Add a Webhook module. Make will generate a Webhook URL.
Connecting the Webhook to Elementor
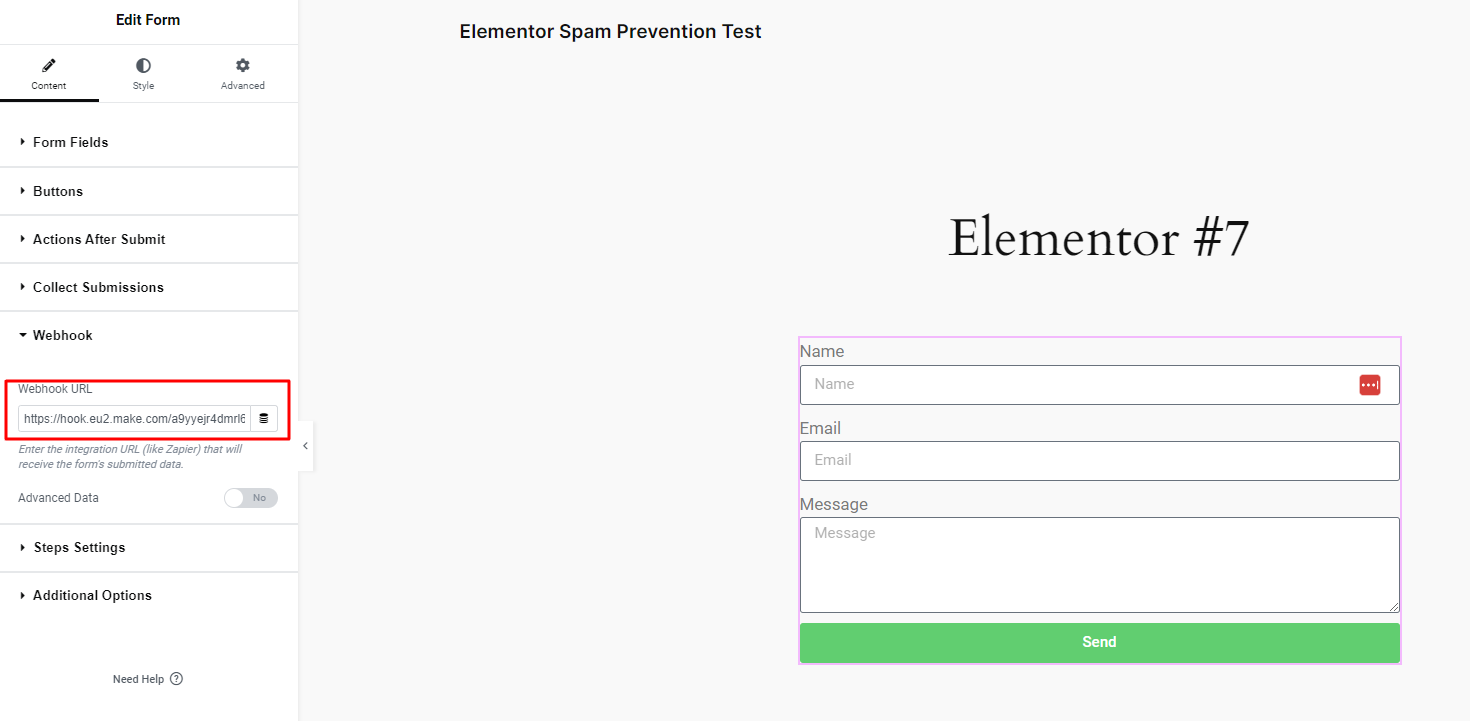
Copy the Webhook URL from Make and paste it into the Elementor form settings under Actions After Submit > Webhook. Now, every time the form is submitted, the form data is sent directly to Make.
Integrating OOPSpam with Make
With the form data flowing into Make, the next step is to integrate OOPSpam to check for spam.
In the Make scenario, click the plus + button to add a new module. Search for OOPSpam Anti-Spam, select Check for Spam, and create a connection using your OOPSpam API key.
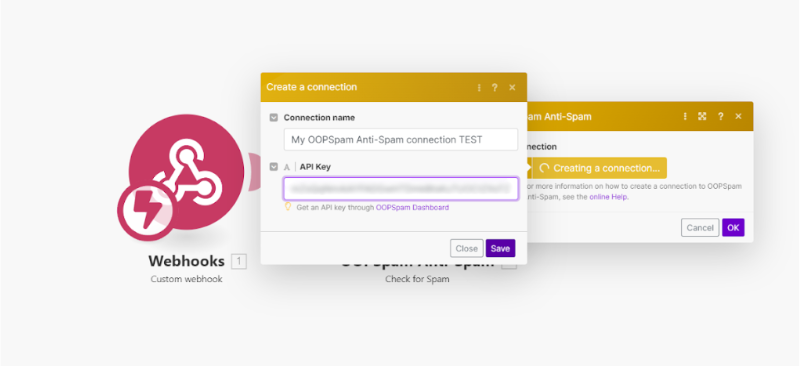
Map the form fields:
-
Content: Map this to the Message field.
-
Email: Map this to the Email field.
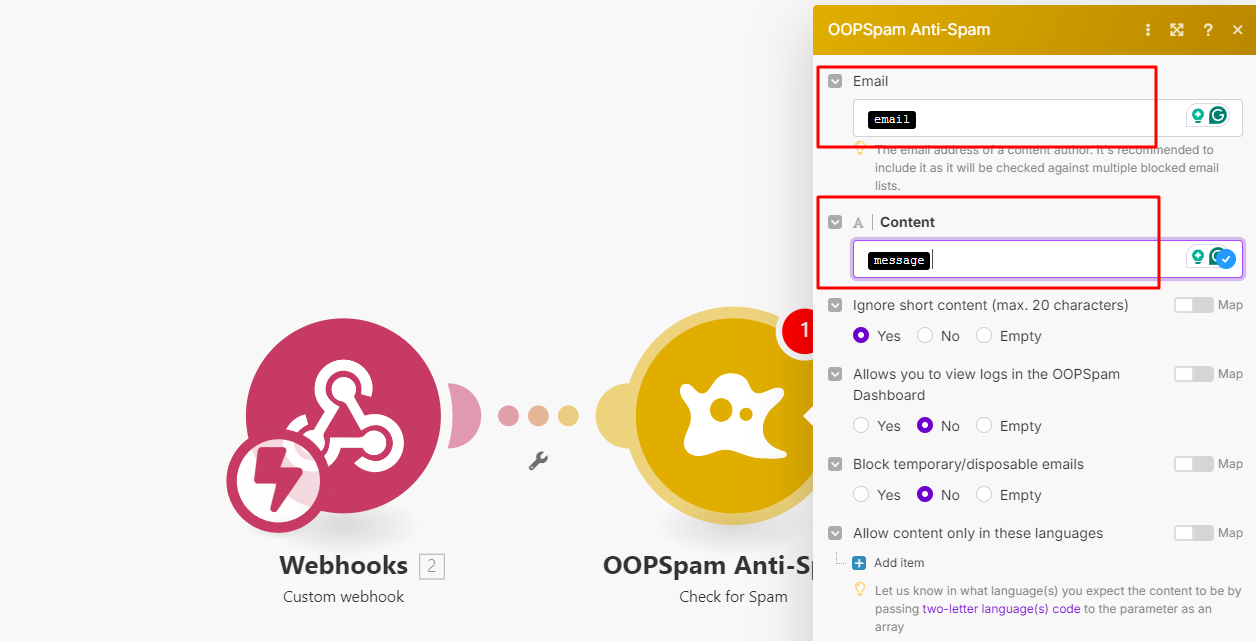
Note: If an IP address field is available, map it for better spam detection. OOPSpam also helps block disposable emails, filter messages by language, and even limit submissions by country for extra protection.
More advanced configurations of spam protection in Elementor forms are available through features such as blocking specific users directly within forms.
Handling Spam and Legitimate Submissions
With OOPSpam integrated and returning a spam score, it’s time to set up conditions for spam and legitimate submissions.
Adding a Router
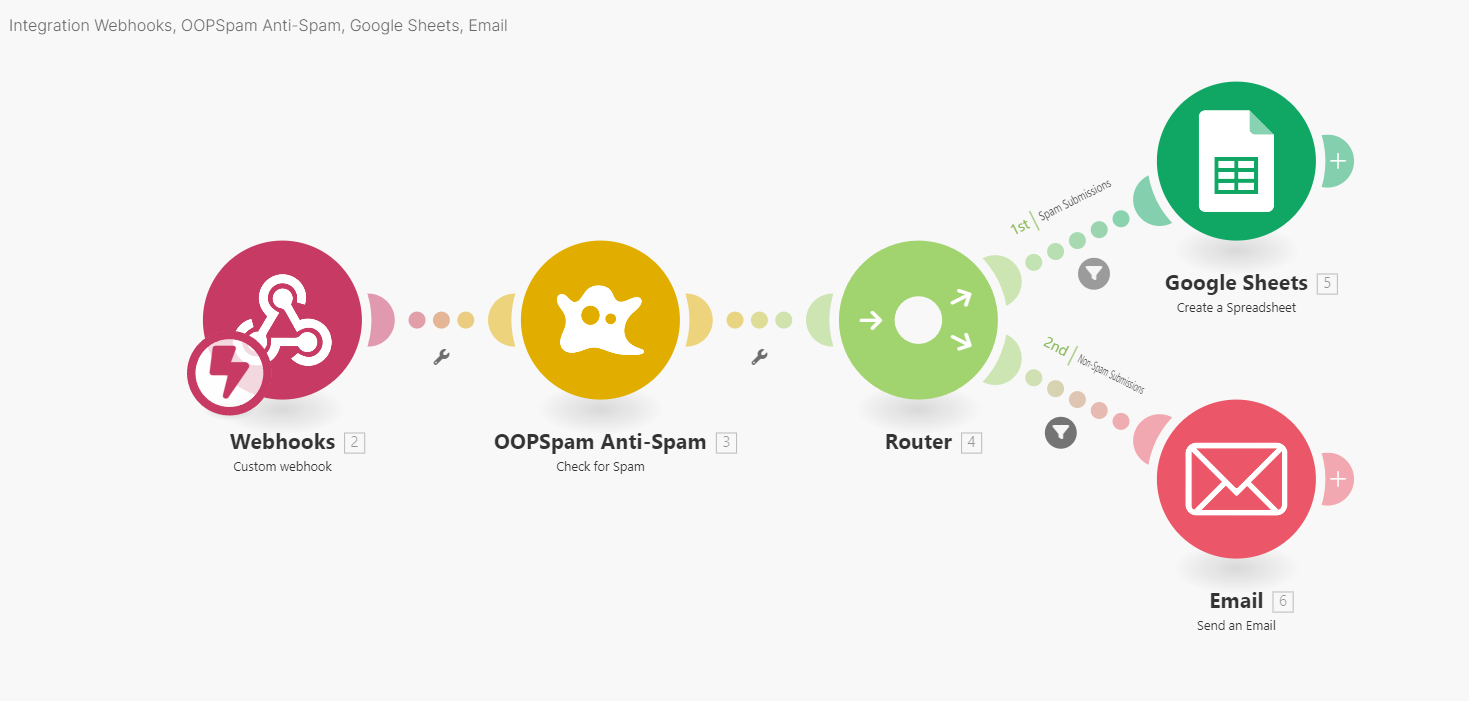
Add a Router module after the OOPSpam Anti-Spam module. This creates two separate paths: one for spam submissions and one for legitimate submissions.
Handling Spam Submissions
For the spam path, set a condition where if the spam score is greater than 2, it triggers this path.
Instead of sending email notifications for spam, add an action to store spam entries in Google Sheets. This allows for later review without cluttering your inbox.
Spam Score Guide:
-
1-2: Not spam
-
3-6: Spam
Handling Legitimate Submissions
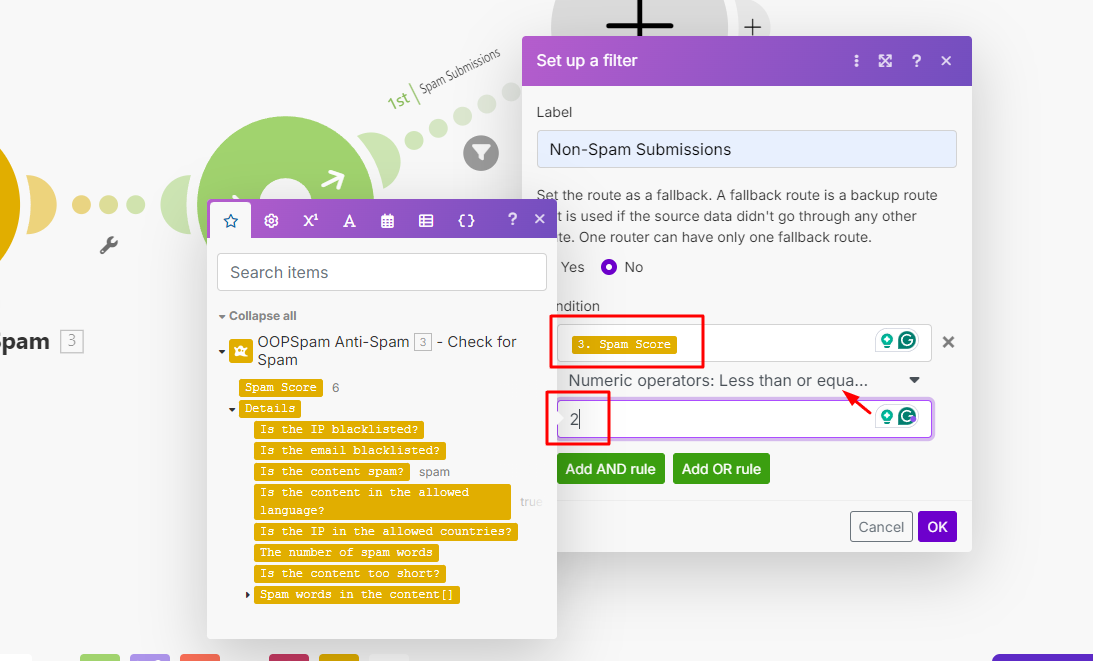
For legitimate submissions, set the condition where the spam score is less than or equal to 2. The form data will be sent to your email inbox and logged in Google Sheets.
Testing the Automation
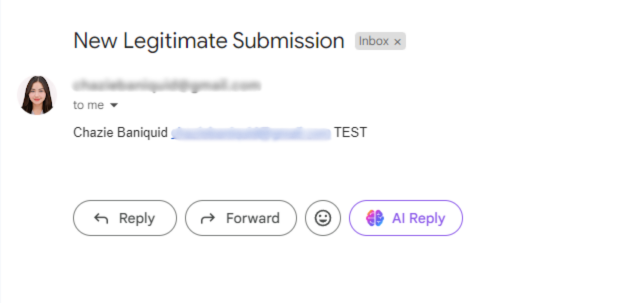
Once everything is set up, run a few tests to ensure the automation works as expected. Submit test forms with both normal and spammy content. You can find useful examples of test data to help fine-tune your forms during the testing phase.
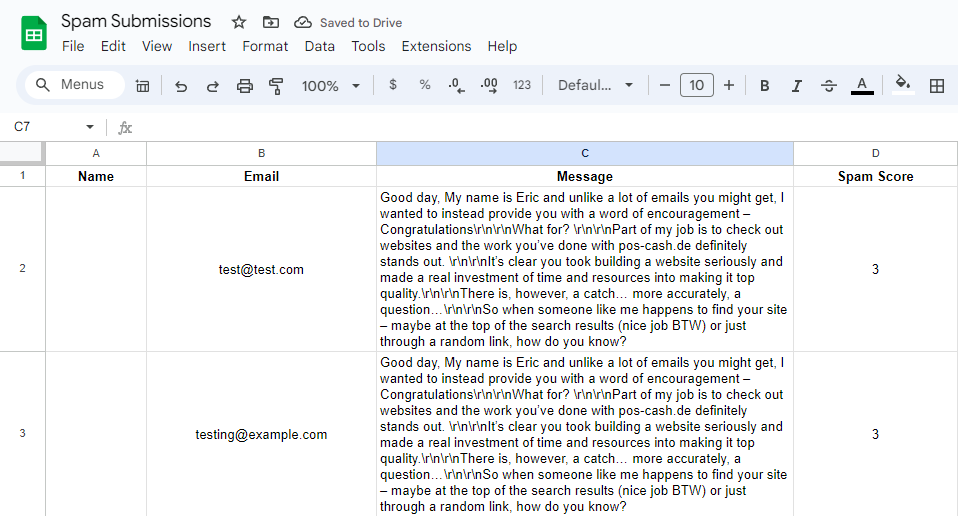
In Make, click Run Once to manually trigger the automation and review the results. Spam submissions should be flagged and stored in Google Sheets, while legitimate ones should reach your inbox.
Wrapping Up
Following these steps, you can set up an automated system to keep spam out of your Elementor forms. OOPSpam handles spam detection, while Make automates the process, saving you hours of manual filtering.
This setup offers reliable spam prevention with the flexibility to customize how submissions are handled. We hope this guide helps you set up an effective spam prevention system using OOPSpam and Make.