
Chazie Baniquid
Technical Content Marketer
7 minutes to read
How to Block VPN and Data Center IP Submissions in Fluent Forms
Getting bombarded with spam through your Fluent Forms? A common source of these annoying, fake submissions is traffic coming from VPNs and cloud data centers. These IPs are often used by bots to bypass filters and flood your inbox with junk. In this guide, we’ll show you how to block those submissions manually through Cloudflare or automatically using the OOPSpam plugin for WordPress.
Why Block VPN and Cloud IPs in Fluent Forms?
Fluent Forms is a flexible WordPress form builder—but even with its built-in protections, spam can still sneak through. Spambots are becoming more sophisticated, often using:
- VPN services to hide their location and identity
- Proxies to bypass IP-based rules
- Cloud servers (like AWS or Google Cloud) to submit high volumes of automated spam
Blocking these IP sources gives you a smarter defense, especially when dealing with unknown or unflagged threats.
Blocking VPNs
When you block VPN IPs, you stop submissions from people trying to hide their identities—like those using Tor or commercial VPN tools. However, some legitimate users (remote workers or users in restricted regions) might also use VPNs, so it’s a setting you’ll want to enable carefully depending on your audience.
Blocking Cloud Providers
This is usually the safer route. The majority of spam bots operate from cloud-hosted servers, not personal devices. Blocking data center IPs (from services like DigitalOcean, Google Cloud, Linode, etc.) drastically cuts down automated form submissions. These IPs are typically not tied to genuine users, making it a low-risk, high-impact solution.
Traditional spam filters only catch repeat offenders. Blocking by IP origin—especially from VPNs and cloud networks—adds an extra layer of protection, catching new and unreported threats early.
Want to verify where a suspicious IP is from? Tools like IP Reputation Check can tell you if it belongs to a data center or VPN.
Method 1: Block VPN and Cloud Traffic with Cloudflare Firewall
If your WordPress site uses Cloudflare, you can create firewall rules to block traffic from known VPNs and cloud providers.
How to Do It
You’ll need to block by ASN (Autonomous System Numbers), which represent networks like Amazon AWS, Hetzner, and various VPN services.
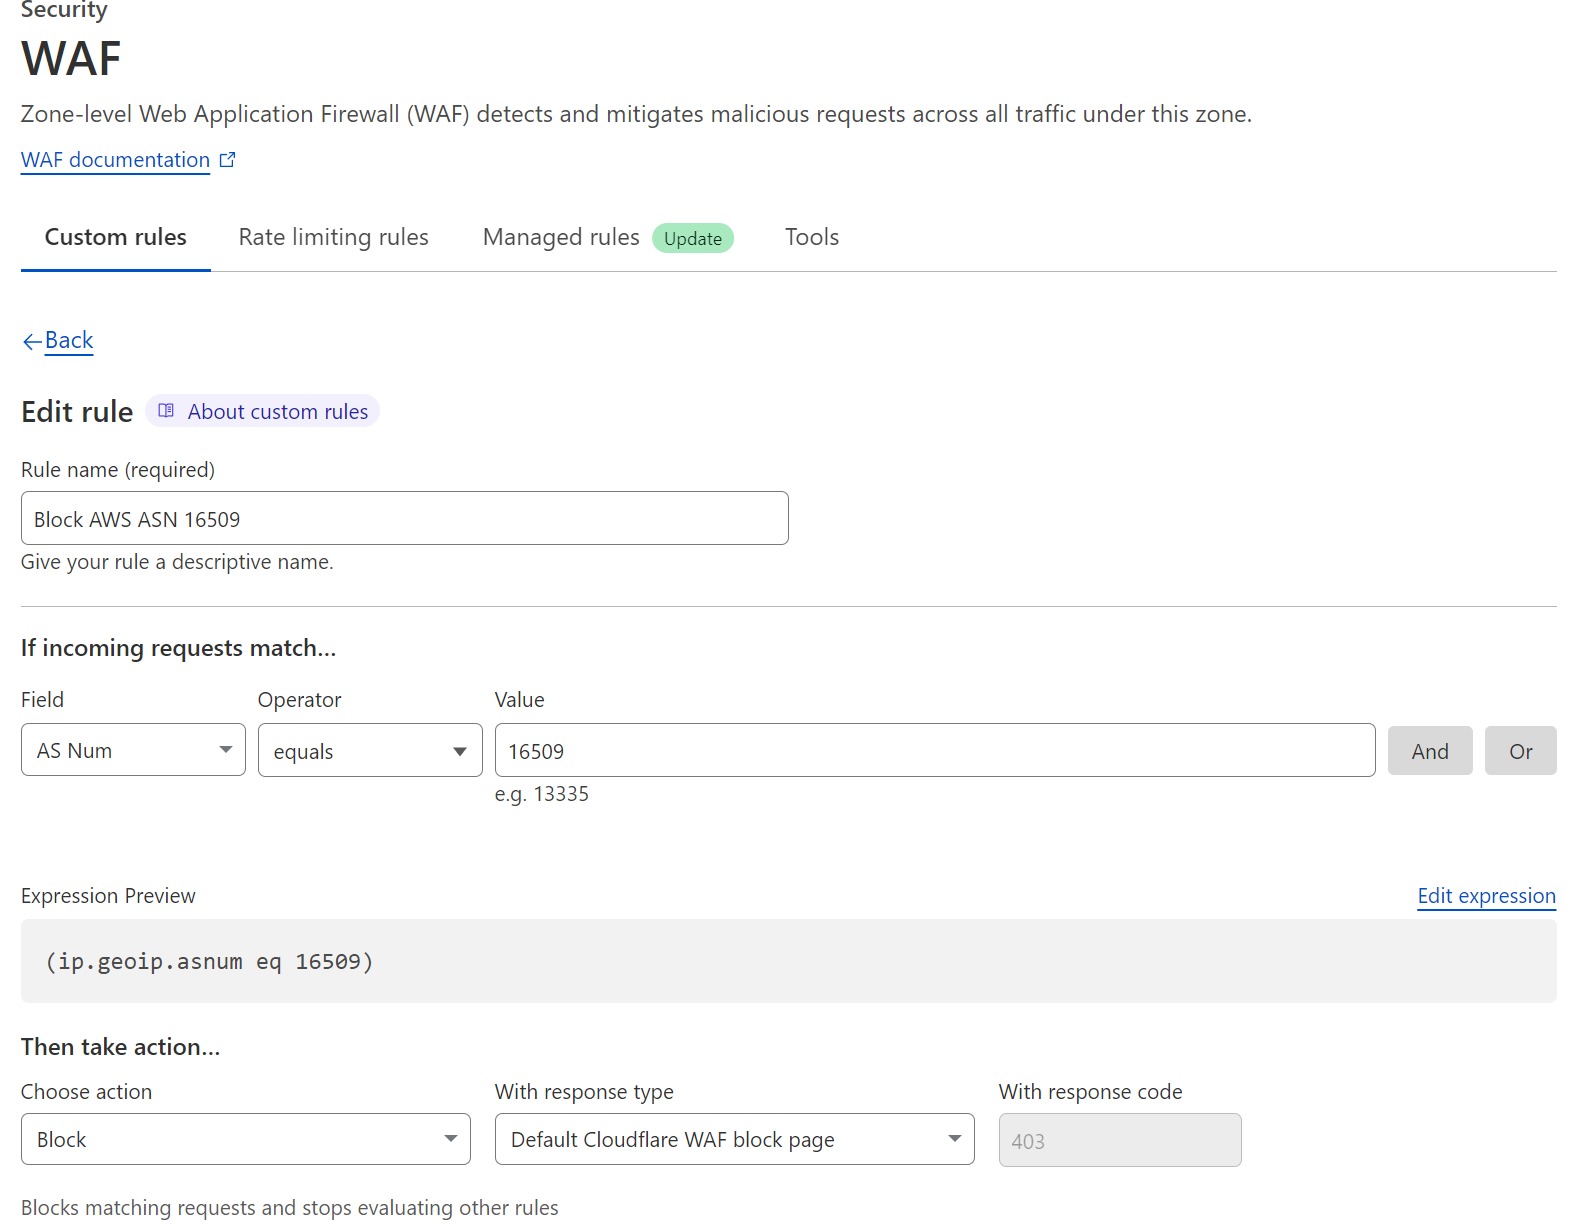
Example: If you see frequent spam from DigitalOcean, block ASN AS14061 using Cloudflare’s dashboard.
Drawbacks
While this method is effective, it’s also:
- Manual: ASNs and IP ranges change frequently. You’ll have to monitor and update regularly.
- Risky: You could block real users, especially those on shared networks or using VPNs.
- Time-intensive: You’ll need to research providers, identify their ASNs, and maintain rule lists.
This method is best for developers or businesses with technical resources and high-traffic sites.
Method 2: Block VPN and Cloud IPs in Fluent Forms with OOPSpam (One-Click Solution)

Don’t want to deal with firewall rules and research? The OOPSpam WordPress plugin (that’s us 👋) offers a one-click solution to block VPN and data center IPs for Fluent Forms.
New Features for IP Filtering
The plugin now includes two powerful toggles:
- Block VPNs
- Block Cloud Providers
Once enabled, these features instantly filter spam from two major sources—without needing to update IP lists or worry about ASNs.
Why OOPSpam Works So Well
The plugin is powered by a real-time database that’s constantly updated and maintained. It includes:
- IP addresses from over 2,000+ data centers
- Known VPN and proxy IPs
- Reputation data and automatic flagging for new spam sources
This gives your Fluent Forms accurate, real-time protection without slowing down your site or requiring hands-on maintenance.
These filters also extend to OOPSpam’s API and integrations with other form builders—so you’re covered across platforms.
How to Enable VPN and Cloud Blocking for Fluent Forms Using OOPSpam
Setting up takes just a few steps:
Step 1: Install OOPSpam Plugin
Go to Plugins > Add New in your WordPress dashboard. Search for OOPSpam Anti-Spam and install the latest version.
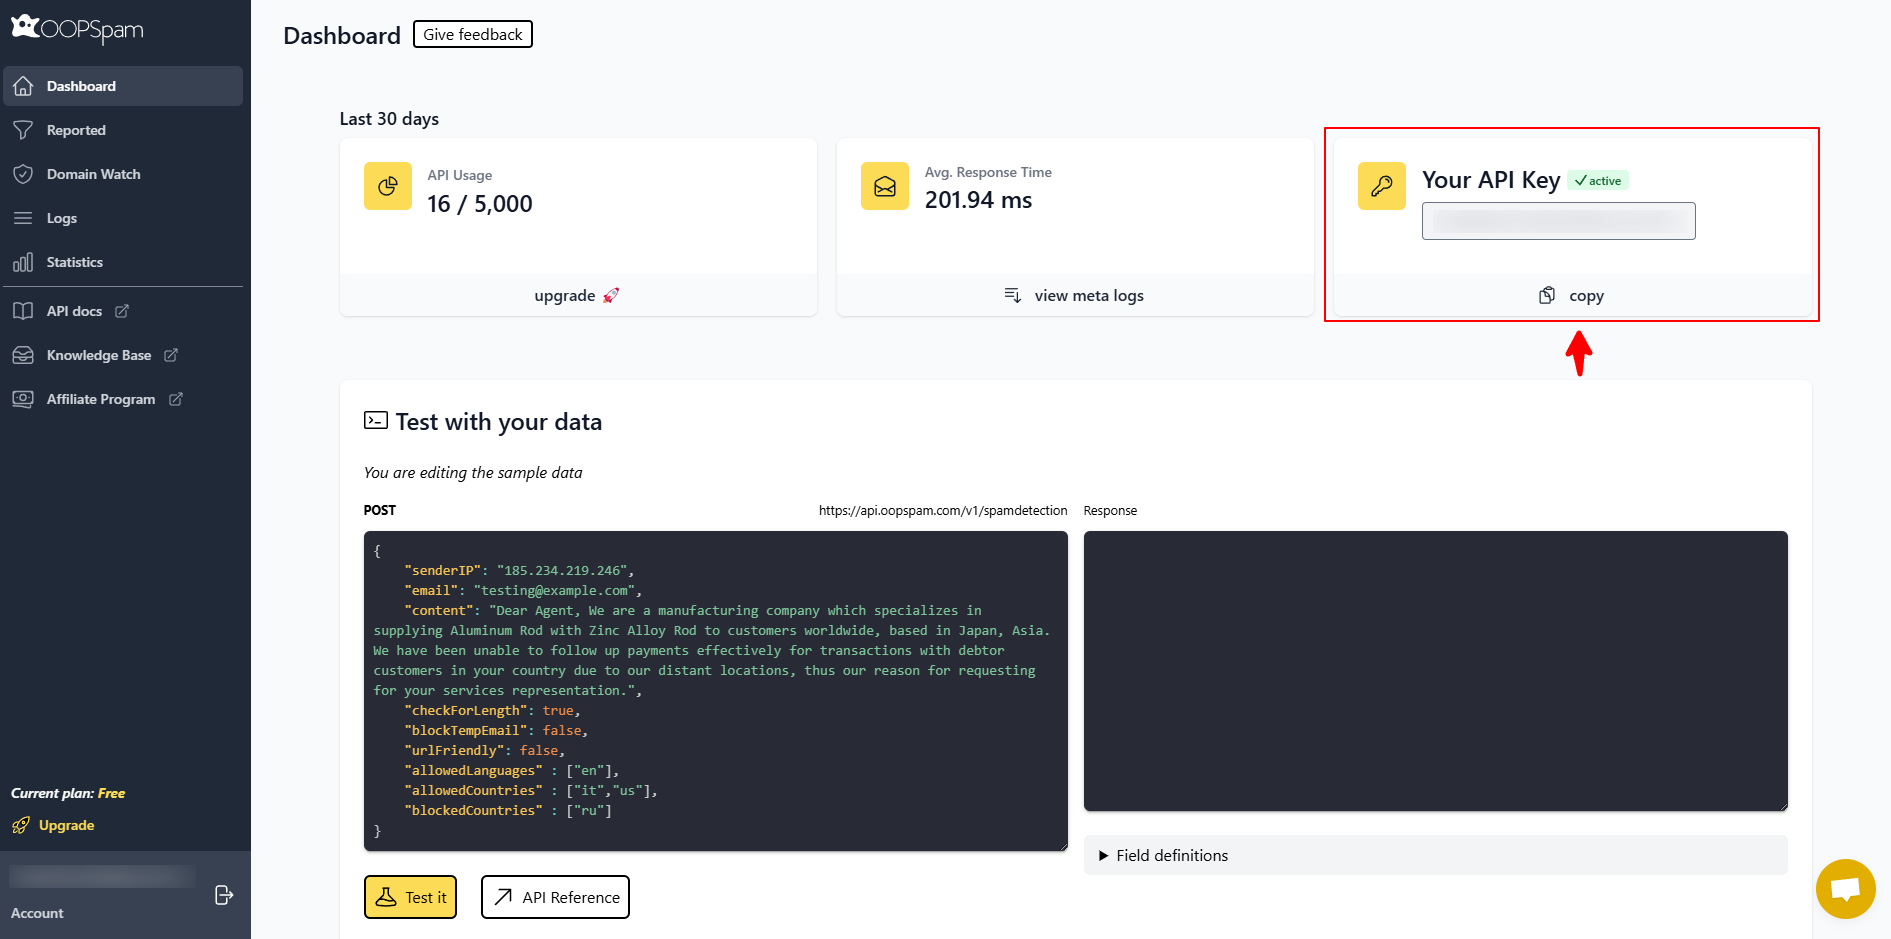
Sign up for an account at the OOPSpam Dashboard, and copy your API key.
Step 2: Configure Plugin Settings
Navigate to Settings > OOPSpam Anti-Spam in your WordPress admin panel. Under the General tab, select “OOPSpam Dashboard” as the source. Paste your API key in the “My API Key” field.
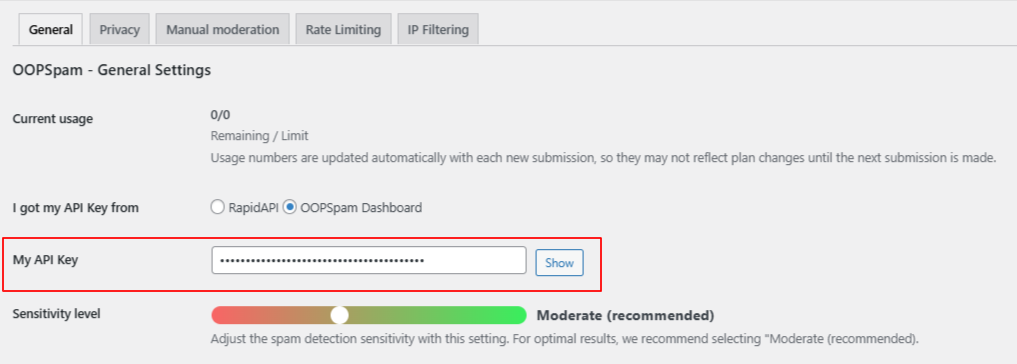
If Fluent Forms is active on your site, a dedicated section will appear with specific options.
- Activate Spam Protection for Fluent Forms by toggling it on
- Optionally, customize the message shown to users if their submission is flagged as spam

Step 3: Enable IP Filtering
Click on the IP Filtering tab to access the VPN and cloud provider settings.
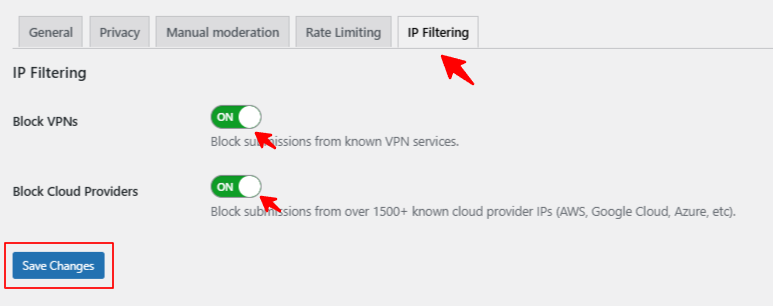
You’ll see two options:
- Block VPNs: Stops form entries from anonymized VPN connections
- Block Cloud Providers: Blocks known spam sources from 2,000+ data centers
Toggle them on based on your risk tolerance, then click Save Changes. That’s it—OOPSpam will now handle the filtering in the background for Fluent Forms.
Balancing Spam Protection with User Experience
Blocking VPN and cloud traffic is effective—but it’s important to apply these settings thoughtfully:
- If your users are global, consider the impact of blocking VPNs
- Monitor flagged submissions regularly to identify any false positives
- Combine this with OOPSpam’s other features (like country filtering or language detection) for a layered anti-spam strategy
Final Thoughts
Fluent Forms is excellent for building forms on WordPress—but like any form plugin, it’s vulnerable to spam. VPNs and cloud-hosted bots are the primary tools used by modern spambots, and blocking them can give your site a major security boost.
Whether you’re managing contact forms, surveys, newsletter sign-ups, or booking forms—OOPSpam + Fluent Forms gives you an easy way to take back control of your inbox. Enable the VPN and Cloud IP blocking today and enjoy peace of mind.
Need help? The OOPSpam team is happy to assist and answer any questions about setup or compatibility with other form plugins like Contact Form 7, Elementor Forms, or Gravity Forms.