
Chazie Baniquid
Technical Content Marketer
12 minutes to read
Stopping Spam Submissions in Google Forms with OOPSpam and Zapier
Spam submissions in Google Forms can be a significant issue, especially if you rely on forms for lead generation, surveys, or data collection. These submissions not only distort your data but also waste time and resources. The good news? There’s an efficient, automated way to filter out spam while ensuring legitimate responses are handled effectively—by integrating OOPSpam with Zapier.
This guide will walk you through the process of connecting Google Forms, OOPSpam, and Zapier to create a seamless spam-free workflow. With this setup, you’ll have more time to focus on what matters: actionable insights from clean, reliable data.
Why You Should Care About Spam Prevention in Google Forms
Spam submissions aren’t just annoying; they can lead to bigger problems, such as:
- Corrupted Data: Spam responses can distort survey results, analytics, or customer feedback, making it hard to draw meaningful conclusions.
- Reduced Productivity: Manually sifting through submissions to separate spam from legitimate responses wastes valuable time.
- Inbox Overload: If your form is set to send email notifications, spam entries can flood your inbox, burying the legitimate responses you actually care about.
How Zapier Enhances Spam Prevention
Zapier is a powerful automation platform that connects thousands of apps, including Google Forms and OOPSpam. With Zapier, you can create “Zaps” (automated workflows) that identify and filter spam submissions in real-time. This not only saves time but ensures that only valid responses are processed further.
What Is OOPSpam and How Does It Work?
OOPSpam (that’s us! 👋) is an advanced anti-spam solution that uses machine learning to identify and block spam submissions. Its sophisticated algorithms analyze multiple factors, including email validity, message content, and disposable email detection.
Key features include:
- Multi-Layer Spam Detection: Filters submissions based on IP addresses, email patterns, and global spam trends.
- Language and Geo-Filters: Restrict submissions based on specific languages or countries.
- Customizable Spam Thresholds: Adjust sensitivity to suit your specific requirements.
When combined with Zapier, OOPSpam becomes an indispensable tool for automating spam detection and handling.
What You’ll Need
To get started, ensure you have:
- Google Form: A functional form for testing (fields like Name, Email, and Message).
- Zapier Account: A free or paid Zapier account to set up the automation.
- OOPSpam Account: Access to the OOPSpam API key for spam detection.
- Google Sheets (Optional): A destination to store valid submissions.
Step 1: Create and Test Your Google Form
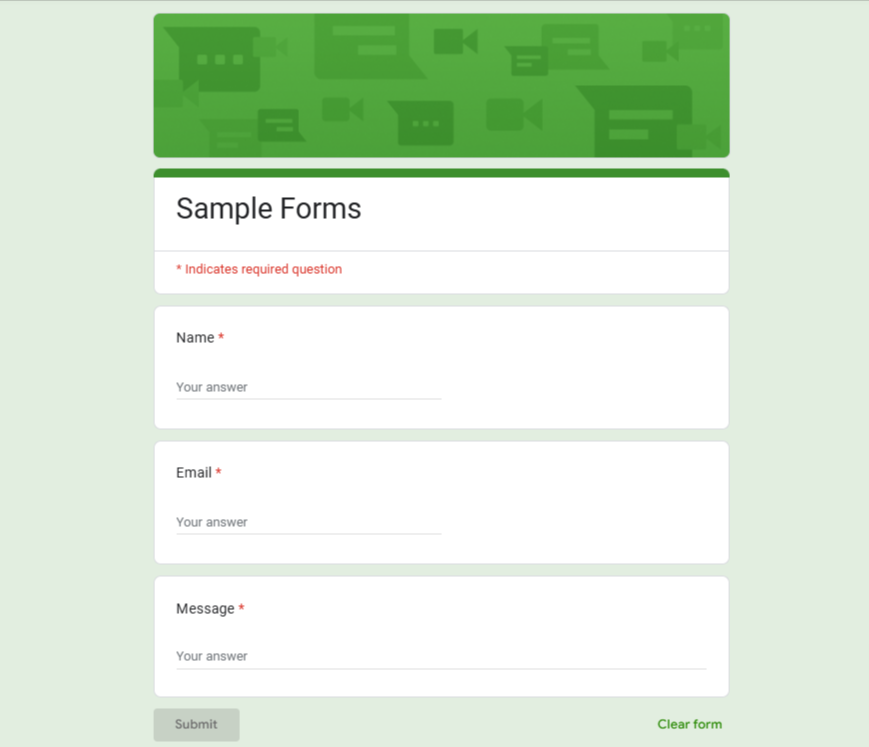
Setting Up Your Google Form
- Log in to Google Forms: Visit Google Forms.
-
Create a New Form:
Add fields such as:
- Name (Short Answer)
- Email (Email format)
- Message (Paragraph or Long Answer)
-
Test the Form
Submit test responses, including both legitimate and spammy submissions. Examples:
- Legitimate: “Alice Smith, alice@example.com, I’m interested in your services.”
- Spam: “!!!WinPrizesWin PrizesWinPrizes!!!, fake@spam.com, Click here to claim now!”
🎯 Pro Tip: Use realistic test data to mimic actual user behavior and refine your spam-detection thresholds accordingly.
Step 2: Set Up Accounts for Zapier and OOPSpam
Before creating your Zap, ensure you have active accounts on both platforms.
Create a Zapier Account
- Sign up at Zapier. The free plan should suffice for basic workflows.
Create an OOPSpam Account
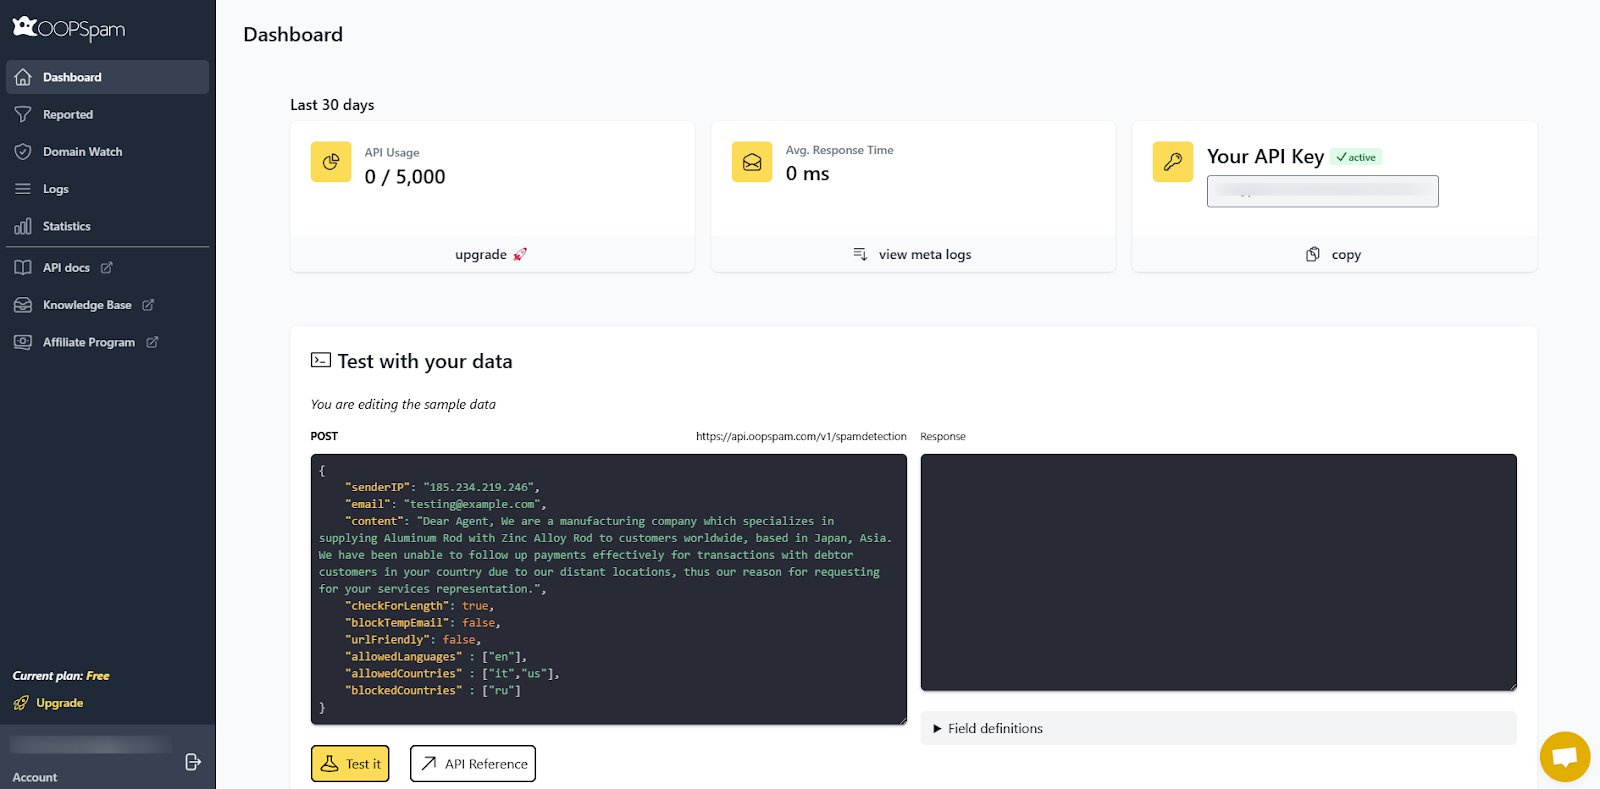
- Sign up at OOPSpam.
- Navigate to the dashboard to retrieve your API Key, which you’ll need to integrate with Zapier.
Step 3: Build the Workflow in Zapier
Zapier acts as the bridge between Google Forms and OOPSpam, enabling automated spam detection. Here’s how to set it up:
Add Google Forms as the Trigger
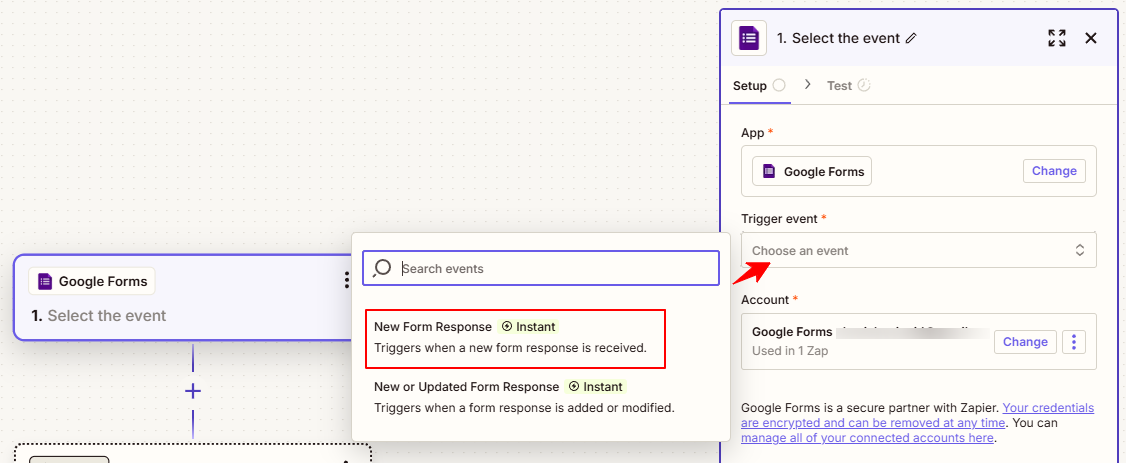
- Start a New Zap: Click “Create Zap” in your Zapier dashboard.
-
Select Google Forms as the Trigger App
- Choose “New Form Response” as the trigger event.
- Connect your Google account and select the form you created earlier.
-
Test the Trigger
- Run a test to verify that Zapier successfully retrieves sample data from your form.
Add OOPSpam to Check for Spam
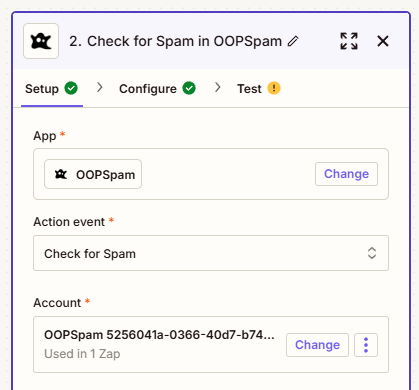
-
Add the OOPSpam App
- Search for OOPSpam in Zapier and select “Check for Spam” as the action event.
- Connect your OOPSpam account using the API Key.
-
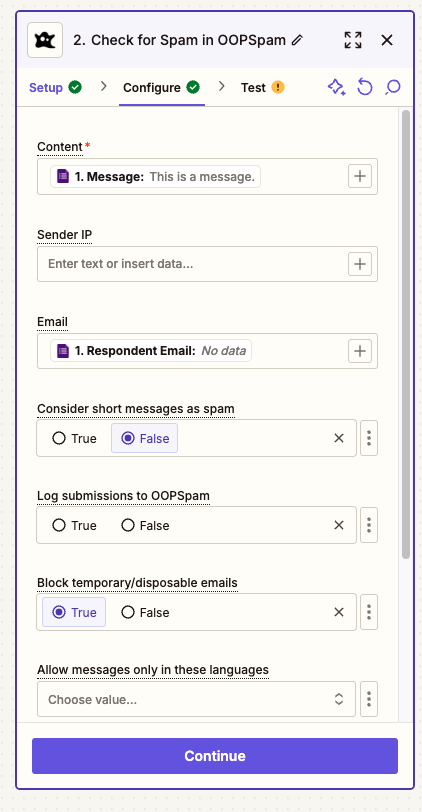
Map Form Fields to OOPSpam
- Email: Map this to the Respondent Email field from your form.
- Content: Map this to the Message field or any primary text field in your form.
- Sender IP: Leave this blank (Google Forms doesn’t provide IP data).
-
Configure Additional Settings
- Consider Short Messages as Spam: Set this to False (as shown in the screenshot). This ensures that legitimate short messages are not flagged as spam.
- Log Submissions to OOPSpam: You can leave this setting as False unless you want to log all submissions in the OOPSpam dashboard for further review.
-
Block Temporary/Disposable Emails: Enable this option to filter out submissions using temporary or disposable email addresses.
- This is recommended to avoid spam generated by fake email accounts.
- Allow Messages Only in Specific Languages: Use this setting to restrict form submissions to certain languages if necessary.
-
Test the OOPSpam Setup
- Submit both legitimate and spammy responses to ensure the spam detection works as intended.
Add a Filter by Zapier to Refine Submissions
Before sending data to Google Sheets or any other destination, it’s essential to add a filtering step to ensure that only legitimate submissions pass through. This filter will use OOPSpam’s spam score to determine whether a submission should proceed or be flagged as spam.
Setting Up the Filter by Zapier
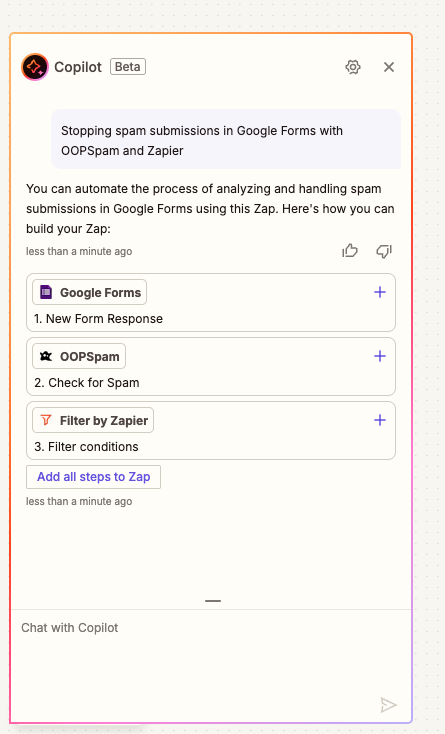
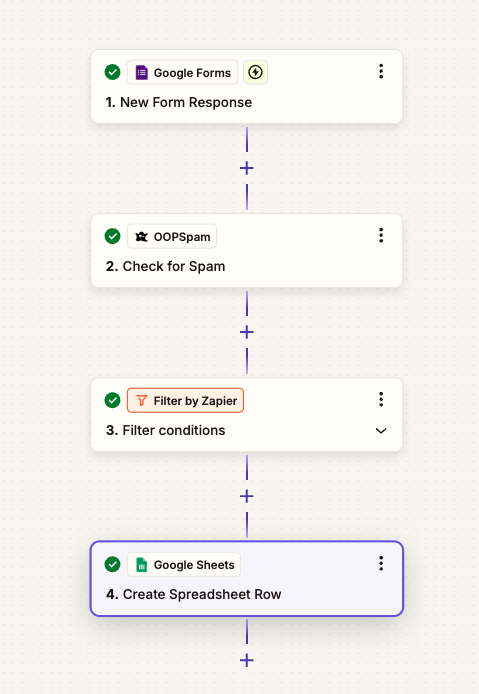
You can also use Zapier’s Copilot to help you get started. Simply input the workflow’s description, and it will generate an initial flow for you. In the example screenshot, I pasted the article’s title, and Copilot created the foundational steps for this Zap automatically, making the setup faster and easier!
-
Add a Filter Step
- Click on the “+” button after the OOPSpam step in your Zap workflow.
- Select “Filter” from the list of available apps.
-
Configure Filter Conditions
-
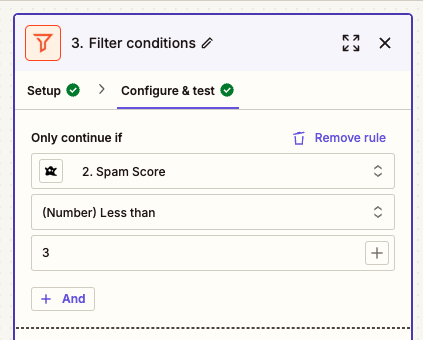
Set the condition to evaluate the spam score provided by OOPSpam. Use the following configuration:
- Field: Select Spam Score (from the OOPSpam output).
- Condition: Select “Less than”.
- Value: Enter 3 (as shown in the screenshot).
This setup ensures that only submissions with a spam score of less than 3 are considered legitimate and proceed to the next steps.
3. Test the Filter
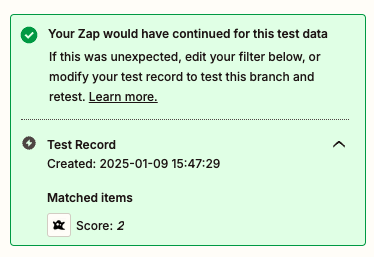
- Zapier will display a test result indicating whether the filter would allow the current test data to pass.
- In the attached example, a test record with a score of 2 successfully passes the filter.
Why This Step is Important
By implementing a filter:
- Spam is Automatically Blocked: Submissions with a high spam score are stopped here and do not proceed further.
- Efficiency is Improved: Only valid responses are sent to your next action, whether that’s storing them in Google Sheets or notifying your team.
- Customizable Thresholds: The spam score threshold (e.g., 3) can be adjusted to meet your specific requirements, depending on how sensitive your form needs to be.
Add Google Sheets to Store Valid Submissions
-
Set Up Google Sheets as the Action App
- Add Google Sheets to your Zap.
- Choose “Create Spreadsheet Row” as the action event.
-
Connect Your Google Account
- If you haven’t already connected your Google account, Zapier will prompt you to do so.
- Grant access to enable Zapier to write data to your Google Sheets.
-
Configuring the Google Sheets Action
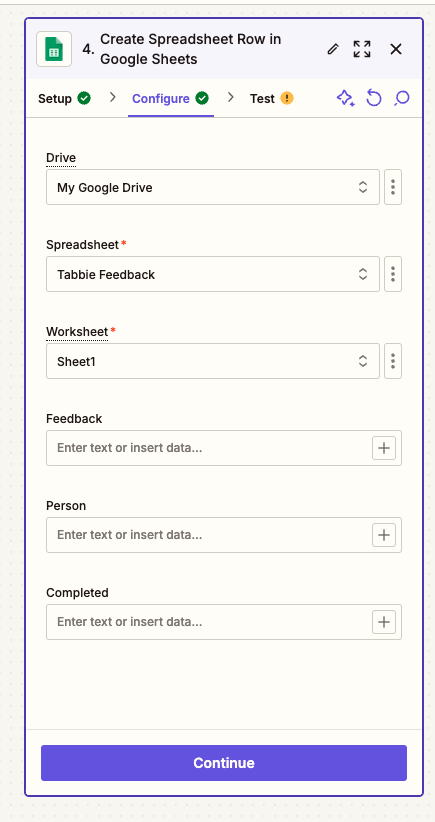
- Drive: Choose the Google Drive where your spreadsheet is located.
- Spreadsheet: Select the specific spreadsheet you want to use.
- Worksheet: Choose the worksheet where the data will be added (e.g., “Sheet1”).
4. Test the Google Sheets Setup
- Verify that only valid submissions are added to the spreadsheet.
Add Notifications for Valid Submissions (Optional)
- Add an Email App: Include an email notification step in the workflow to alert you of valid submissions.
- Test Notifications: Verify that notifications are sent only for valid submissions.
🎯 Pro Tip: Instead of email notifications, you can integrate Slack to receive instant alerts in a dedicated channel.
Step 4: Test the Entire Workflow
Testing is crucial to ensure the workflow operates as expected.
- Submit both spammy and legitimate responses to your Google Form.
-
Check the workflow results in Zapier:
- Spam submissions should be flagged and discarded.
- Legitimate submissions should be stored in Google Sheets or sent via email.
Step 5: Publish and Monitor the Zap
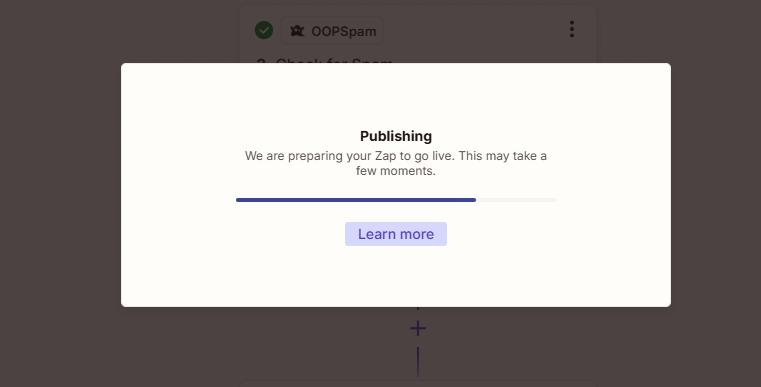
- Turn on the Zap: Once everything is working perfectly, publish the Zap to start processing live form submissions.
- Monitor Performance: Periodically review spam-detection results and adjust settings like spam score thresholds to improve accuracy.
Final Thoughts
By combining the spam-detection capabilities of OOPSpam with the automation features of Zapier, you can create a highly effective system to filter spam submissions from Google Forms. This setup not only saves time but also ensures that your data is accurate and actionable.
Whether you’re using Google Forms for lead generation, surveys, or event registrations, this workflow is your ultimate solution for managing submissions effortlessly. Get started with OOPSpam and Zapier today, and say goodbye to unwanted submissions for good!
If you have questions or need further assistance, feel free to reach out to OOPSpam’s support team or check out our documentation.