
Chazie Baniquid
Technical Content Marketer
9 minutes to read
4 Ways to Stop Spam on Your Paid Memberships Pro Membership Site

Running a membership site using Paid Memberships Pro (PMPro) offers numerous benefits, but it also opens the door to potential spam threats. Spam can clutter your user database, skew analytics, and pose security risks. Implementing robust anti-spam measures is essential to maintain the integrity and professionalism of your site.
Let’s explore five effective strategies to prevent spam on your PMPro membership site. We’ll delve into built-in features, third-party integrations, and advanced tools like the OOPSpam Anti-Spam plugin to ensure your site remains secure and user-friendly.
Why Is Spam a Big Problem for Membership Sites?
Spam isn’t just annoying; it can seriously harm your business. Here’s why tackling spam should be a top priority:
- Fake sign-ups waste resources – Spam accounts clog your database and make managing real members harder.
- It skews analytics – If you track conversions, spam sign-ups can inflate your numbers and give you inaccurate data.
- Spam bots exploit security vulnerabilities – Many spam accounts are created to test for weak spots in your site’s security.
- It damages your reputation – A spam-filled site looks unprofessional and can discourage real members from joining.
The bottom line? Ignoring spam isn’t an option. Now, let’s dive into how you can stop it.
1. Use OOPSpam for Machine Learning Spam Protection
If you want the most effective and hassle-free way to stop spam, OOPSpam (that’s us! 👋) is your best option. Unlike CAPTCHA-based solutions that frustrate users, OOPSpam uses advanced machine learning to block spam before it even reaches your site.
Why OOPSpam?
- No CAPTCHAs Required – No annoying puzzles or image-clicking.
- Customizable Filtering – Block specific IP addresses, email domains, and keywords.
- Zero Performance Impact – Unlike reCAPTCHA, it won’t slow down your site.
- Country & Language Filtering – Restrict spam from specific regions.
- Rate Limiting – Prevents abuse and bot attacks.
- Machine Learning Detection – Learns from spam patterns to improve accuracy over time.
How to Set Up OOPSpam on Your PMPro Membership Site
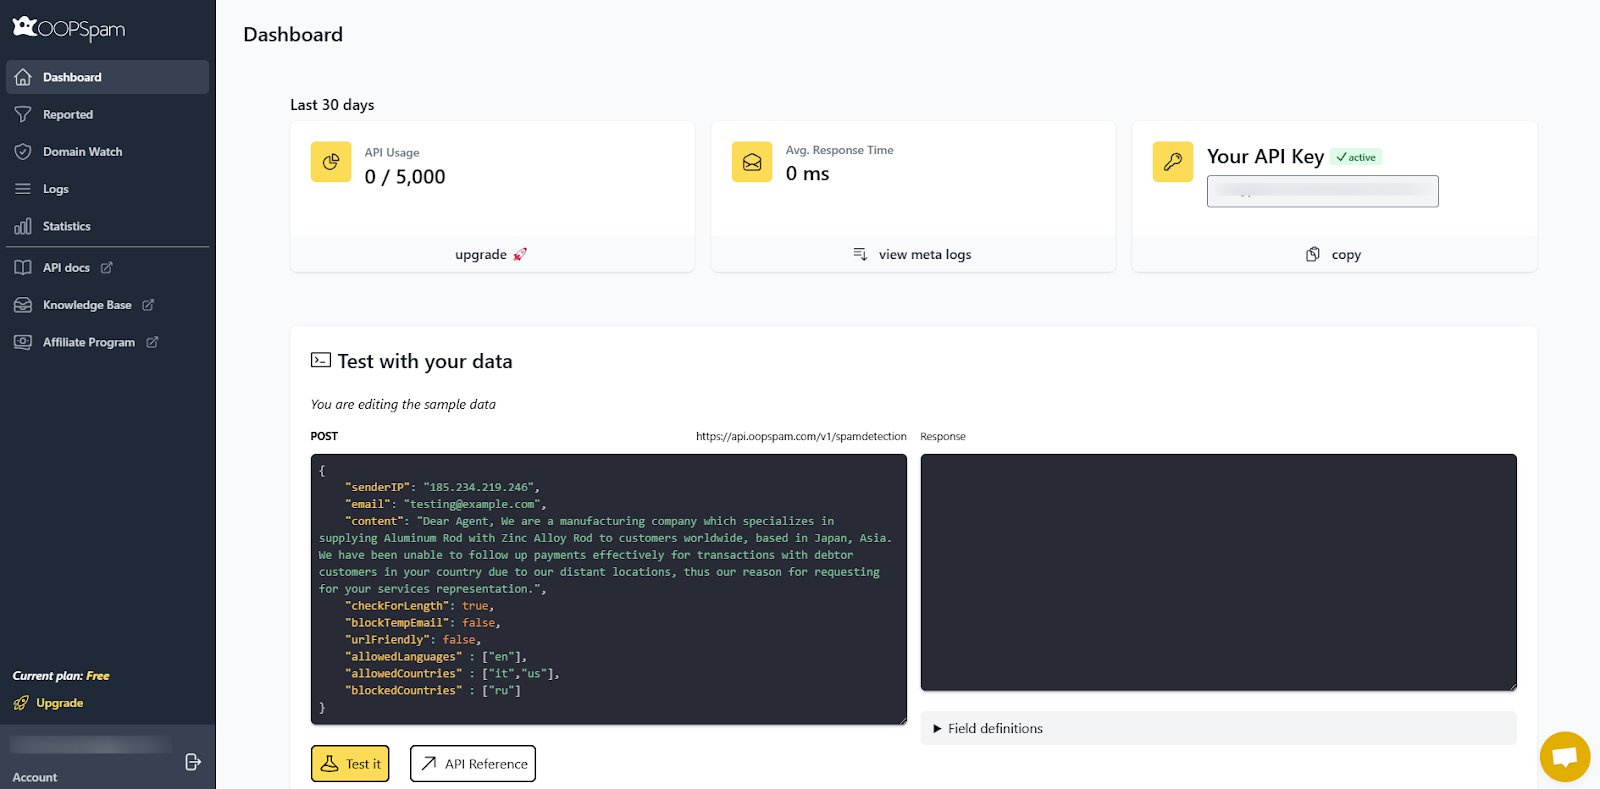
1. Get an API Key from OOPSpam
- Visit OOPSpam and sign up.
- Copy your API key from the dashboard.
2. Install the OOPSpam WordPress Plugin
- Go to WordPress Dashboard > Plugins > Add New.
- Search for OOPSpam Anti-Spam and click Install Now, then Activate.
3. Configure OOPSpam Settings
Now that the plugin is installed, you need to connect it to your OOPSpam account and configure spam filtering settings.
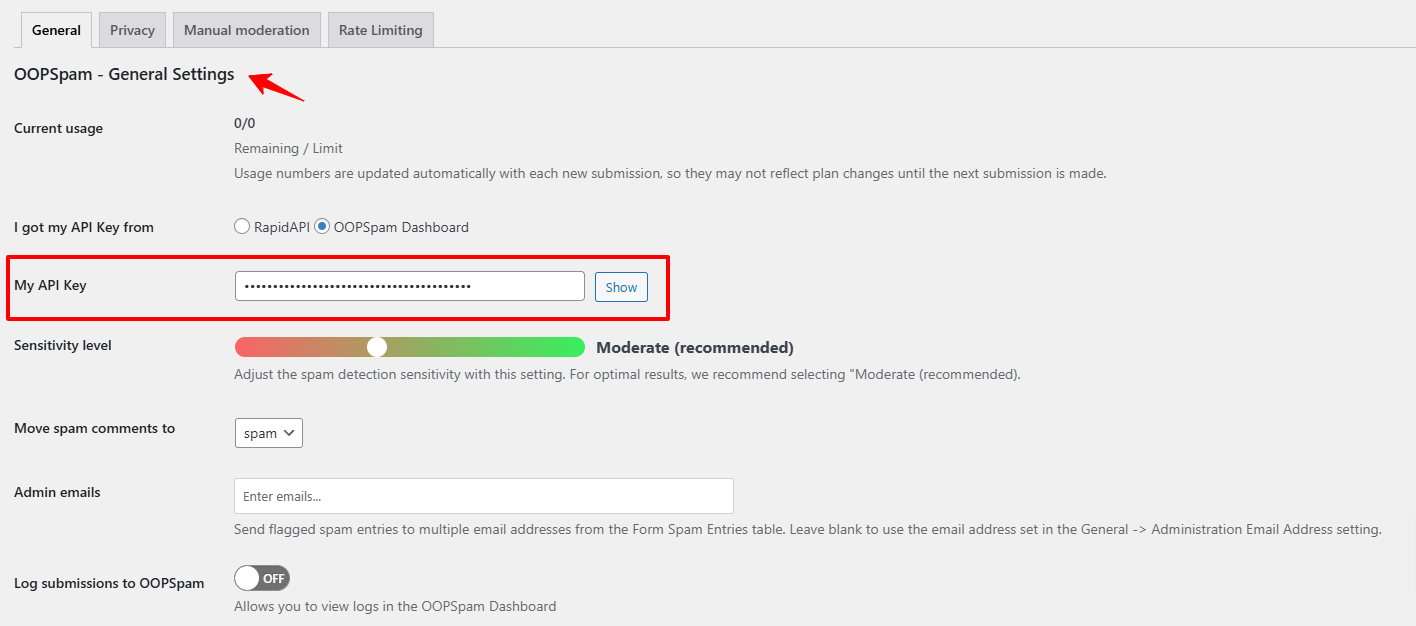
- Navigate to Settings > OOPSpam Anti-Spam.
- Enter your API key in the designated field.
- Configure additional settings such as country restrictions, language restrictions, and manual moderation as needed.
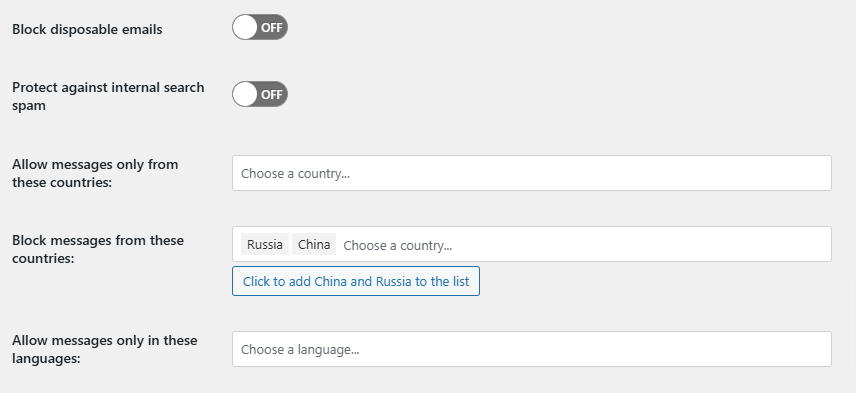
- Go to WordPress Dashboard > Settings > OOPSpam Anti-Spam.
- Find the Country Filtering section.
- Choose one of the following options:
-
-
Allow messages only from specific countries – Select countries from which you want to accept messages.
-
Block messages from specific countries – Choose countries to block from submitting forms.
-
Language Allowlist – Select the languages you want to allow.
-
- Click Save Changes to apply.
💡 When to Use This?
- If spam is primarily coming from a few specific countries.
- If your business only operates in certain regions and you want to restrict form submissions from outside those areas.
4. Customize Spam Protection Settings
OOPSpam offers advanced customization for fine-tuning spam protection. If you need more control over spam filtering, you can manually block or allow specific IP addresses, email domains, and keywords.
This is useful for stopping repeated spam attacks from the same sources or ensuring important submissions aren’t mistakenly filtered out.
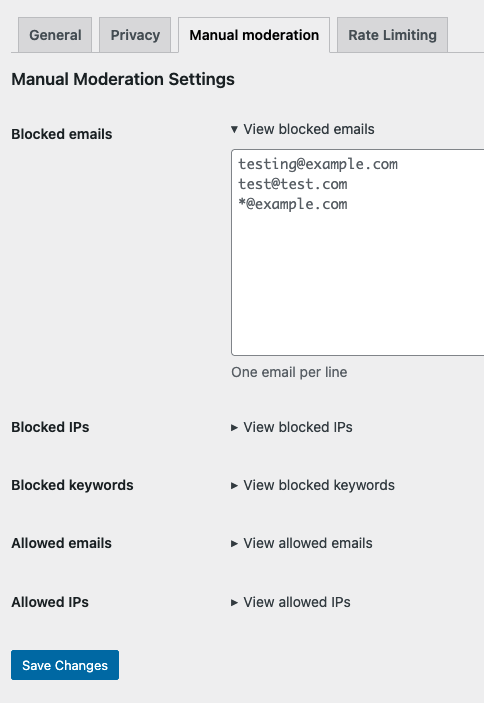
How to Set Up Manual Moderation:
- Go to WordPress Dashboard > Settings > OOPSpam Anti-Spam.
- Click on the Manual Moderation tab.
- Enter the specific IP addresses, email domains, or keywords you want to block or allow.
- Click Save Changes to apply your settings.
5. Enable OOPSpam for Paid Memberships Pro

- Ensure that Paid Memberships Pro are listed under supported forms in OOPSpam settings.
- Toggle “Activate Spam Protection” to ON.
Now, OOPSpam will automatically filter spam from PMPro sign-ups, keeping your membership site secure and bot-free.
2. Enable Built-in PMPro Spam Protection Features
Paid Memberships Pro offers several built-in features designed to combat spam effectively.
Advanced Spam Protection Setting
PMPro includes a dedicated spam protection setting that helps prevent multiple failed checkout attempts from the same IP address.
How to Enable:
- Navigate to Memberships > Settings > Advanced in the WordPress admin dashboard.
- Locate the “Enable Spam Protection?” option.
- Select “Yes – Enable Spam Protection”.
With this setting enabled, the plugin will automatically block checkout for any IP address with more than 10 checkout failures within 15 minutes. This helps prevent fraudulent transactions and spam sign-ups.

You can check for “Potential Spam Checkouts” by going to the Users section in the WordPress admin panel.
Email Confirmation Add-On
Requiring email confirmation adds a layer of verification, ensuring that the email addresses provided are valid and belong to the users registering.
How to Implement:

- Install the Email Confirmation Add-On for PMPro.
- Configure the settings to require email confirmation for new registrations.
This process helps in filtering out fake accounts and ensures that only users with valid email addresses can complete the registration process.
Approval Process for Membership Add-On
For higher control over member registrations, the Approval Process for Membership Add-On allows administrators to manually approve or deny membership applications.
Steps to Set Up:

- Install the Approval Process for Membership Add-On.
- Configure the settings to require admin approval for new memberships.
This method ensures that each member is vetted before gaining access, significantly reducing the chances of spam accounts infiltrating your site.
3. Add CAPTCHA (reCAPTCHA or hCaptcha) to Stop Bots
While CAPTCHA isn’t perfect, it can still block basic spam bots. PMPro allows you to integrate:
- Google reCAPTCHA – AI-driven spam detection.
- hCaptcha – A privacy-friendly CAPTCHA alternative.
How to Set Up Google reCAPTCHA on PMPro
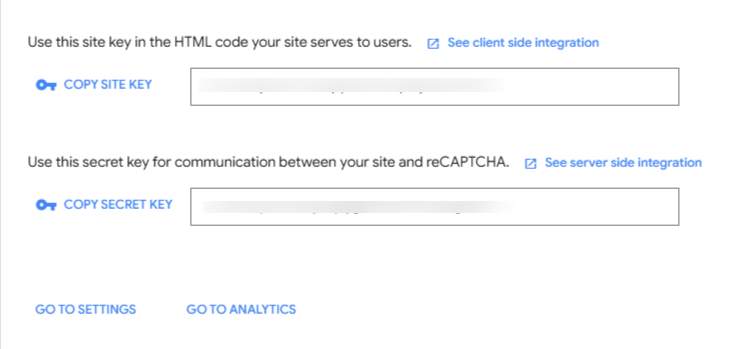
- Install the reCAPTCHA Plugin for WordPress.
- Navigate to PMPro > Settings > reCAPTCHA.
- Enter your Google reCAPTCHA API keys.
- Enable reCAPTCHA for registration, login, and checkout forms.
Limitations of reCAPTCHA:
- Some advanced bots can bypass reCAPTCHA.
- May reduce conversions if users find it frustrating.
If you’re looking for a better alternative, try Cloudflare Turnstile (next section).
4. Use Cloudflare Turnstile for Seamless Spam Prevention

Cloudflare Turnstile is a CAPTCHA-free, user-friendly spam protection tool. It validates users in the background without requiring them to solve puzzles.
Why Cloudflare Turnstile?
- No User Interaction Needed – Works automatically.
- Privacy-Friendly – Doesn’t track user behavior.
- Faster Than reCAPTCHA – No heavy scripts slowing your site.
How to Enable Cloudflare Turnstile for PMPro
- Install the Simple Cloudflare Turnstile Plugin.
- Sign up at Cloudflare Turnstile and get your Site Key & Secret Key.
- Go to WordPress > Turnstile Settings and enter your keys.
- Enable it for PMPro registration and login pages.
Now, you get bot protection without annoying real users.
Final Thoughts
Spam can be frustrating, but stopping it is easier than you think. Here’s the best strategy:
- Use OOPSpam – Machine learning spam filtering (best option). A more advanced filter if other options fails.
- Enable PMPro’s built-in tools – Email verification, approval processes, and membership restrictions.
- Add CAPTCHA or Cloudflare Turnstile – CAPTCHA-free spam prevention.
By implementing these four spam-blocking techniques, your PMPro membership site will remain secure, clean, and easy to manage. If you have any questions or need extra guidance, OOPSpam’s support team is always here to help. You can also explore our documentation for detailed setup instructions.