
Chazie Baniquid
Technical Content Marketer
6 minutes to read
How to Block VPN and Data Center IP Submissions in Contact Form 7
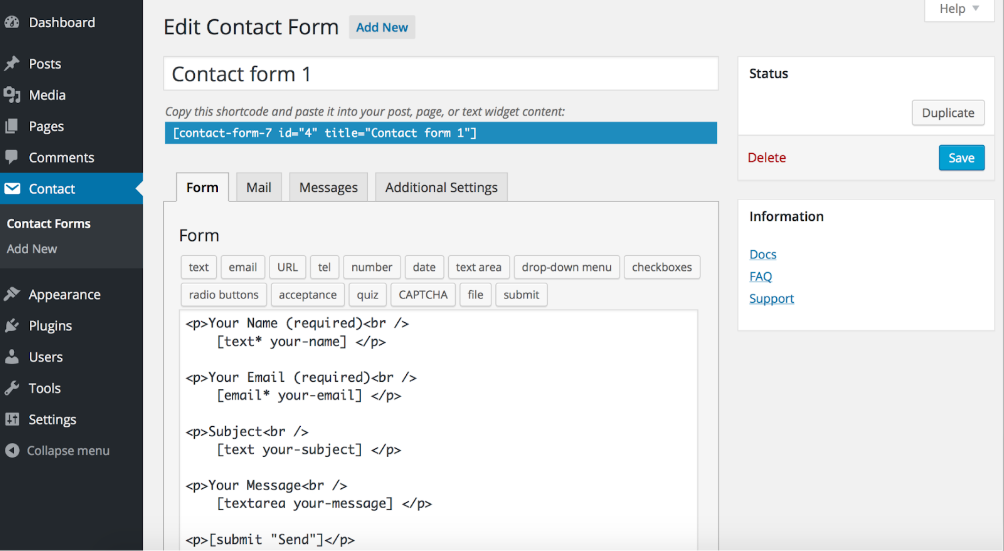
Contact Form 7 is one of the most widely used WordPress form plugins—but it’s also a common target for spambots. If you’ve been receiving spammy submissions, especially from anonymous or suspicious sources, it’s likely due to VPNs and cloud-hosted servers.
In this guide, we’ll show you how to block spam from these sources—either manually via Cloudflare or automatically using the OOPSpam WordPress plugin.
Why Block VPN and Cloud Provider IPs in Contact Form 7?
Most spambots rely on cloud services and VPNs to automate attacks and avoid detection. Here’s how they get around basic spam filters:
- VPNs allow them to mask their IP and location
- Proxies rotate their identities rapidly
- Cloud servers like AWS or DigitalOcean give them the power to send large volumes of spam
Blocking VPNs
Turning on VPN blocking helps you stop form submissions from users hiding behind tools like Tor or commercial VPNs. Keep in mind that some legitimate visitors might also use VPNs for privacy or remote work. So, this setting is powerful but should be used thoughtfully.
Blocking Cloud Providers
This is a safer and more effective method. Most automated spam comes from cloud infrastructure, not from real people. Blocking IPs from data centers ensures your Contact Form 7 forms aren’t flooded by bots using hosting platforms like Google Cloud, OVH, or Linode.
Spam plugins usually rely on previous data to flag suspicious IPs—but by blocking VPN and data center traffic at the source, you get ahead of new threats before they start.
Not sure about a certain IP? Tools like IP Reputation Check can help confirm whether it belongs to a VPN or data center.
Method 1: Manually Block VPN and Cloud IPs Using Cloudflare Firewall
If your website is connected to Cloudflare, you can manually block traffic from certain networks using ASN-based rules.
How to Do It
ASN (Autonomous System Numbers) are unique IDs assigned to hosting providers and network operators. You can block all traffic from known spammy networks by entering their ASN into Cloudflare’s firewall rules.
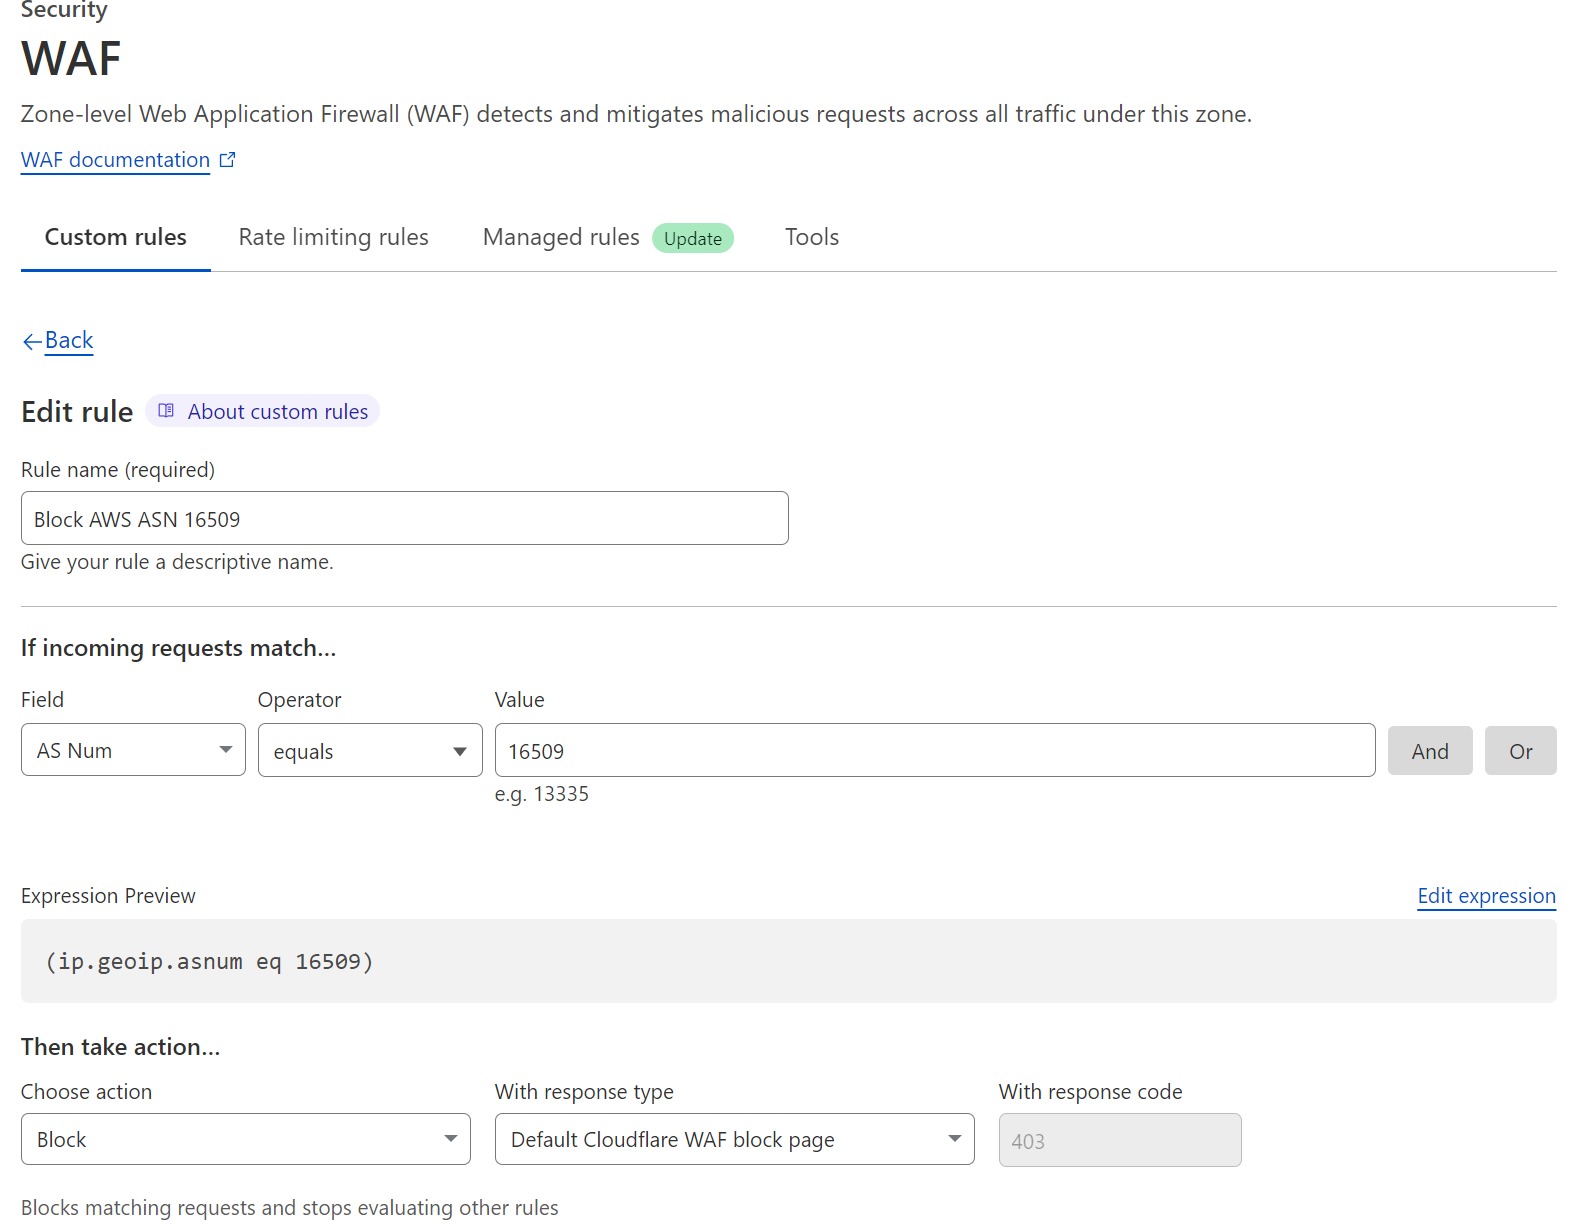
Example: To block spam from DigitalOcean, use ASN AS14061 in Cloudflare’s settings.
Pros & Cons
Pros:
- Offers powerful control over traffic sources
- Blocks spam before it reaches your server
Cons:
- ASNs and IPs frequently change, requiring regular maintenance
- May block legitimate users (especially those on business VPNs or remote cloud setups)
- Requires some technical know-how and time
This method is better suited for developers or high-traffic websites with IT support.
Method 2: Block VPN and Cloud IPs in Contact Form 7 with OOPSpam

For a faster and easier solution, use the OOPSpam WordPress plugin (that’s us 👋), which works seamlessly with Contact Form 7.
It now includes two powerful toggles under the IP Filtering settings:
- Block VPNs
- Block Cloud Providers
With just a click, you can reduce spam from the most common sources—no manual filters or firewall rules required.
Why OOPSpam Is Ideal for Contact Form 7 Users
The plugin doesn’t just rely on spam history—it uses a live, constantly updated database of:
- 2,000+ data center IP ranges
- Known VPN and proxy IPs
- Realtime reputation scoring based on current behavior
This ensures your Contact Form 7 submissions are protected 24/7, without adding extra plugins or custom code.
And if you’re using the OOPSpam API or have other forms in use, these protections apply there too.
How to Set Up VPN and Cloud IP Blocking with OOPSpam for Contact Form 7
Step 1: Install the Plugin
Head to your WordPress dashboard and install OOPSpam Anti-Spam from the plugin directory.
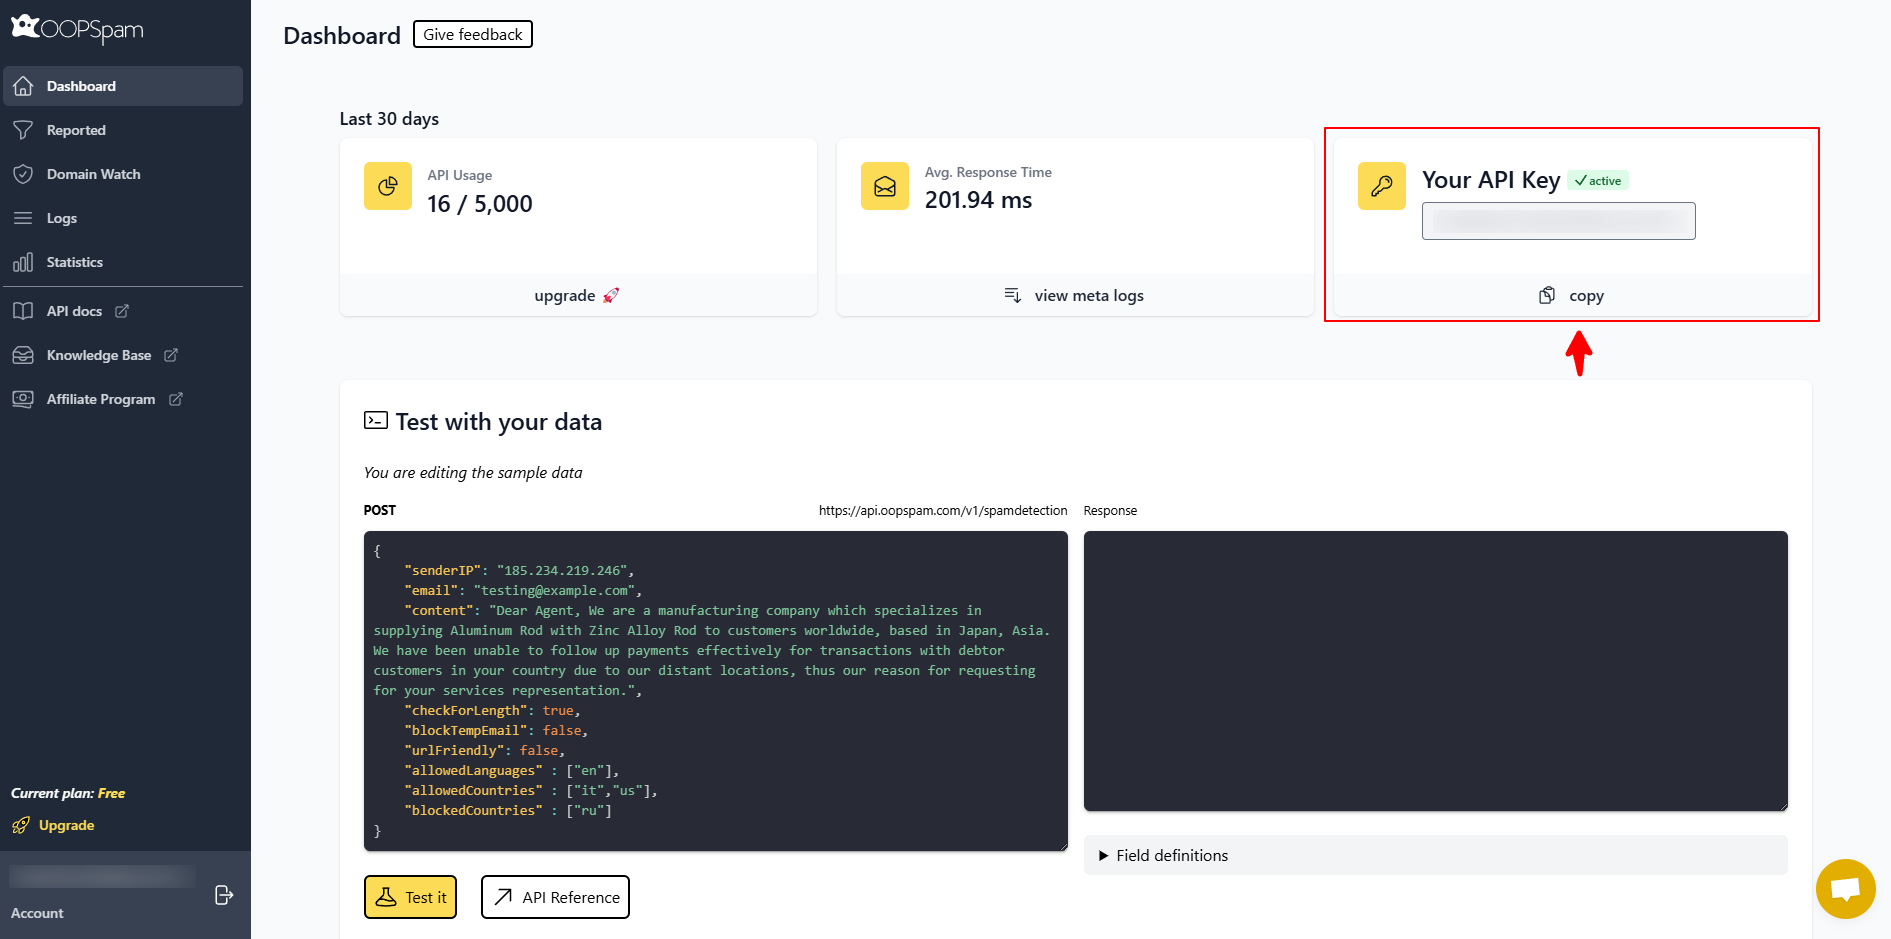
Get your API key from the OOPSpam Dashboard and copy it.
Step 2: Add the API Key and Activate Contact Form 7 Protection
In your WordPress admin, go to Settings > OOPSpam Anti-Spam.
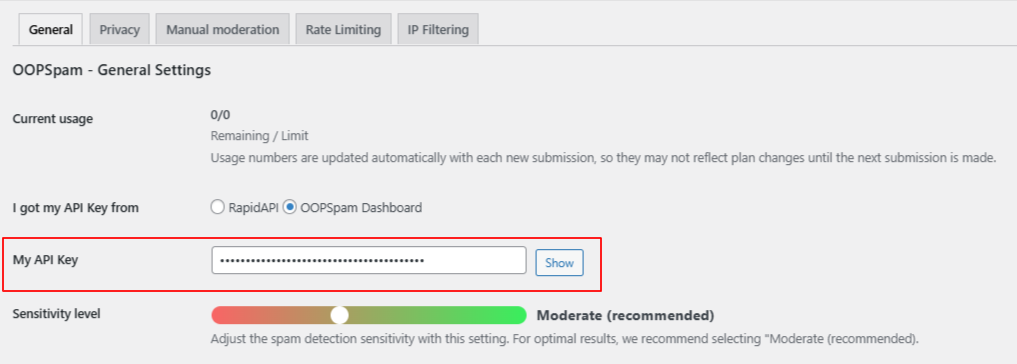
- Under the General tab, select OOPSpam Dashboard as your source
- Paste your API key in the field labeled “My API Key”
If Contact Form 7 is active, a new section labeled Contact Form 7 will appear.
- Activate Spam Protection for Contact Form 7
- Optionally, add a custom error message for blocked submissions

Step 3: Enable IP Filtering
Now, click the IP Filtering tab in the plugin settings.
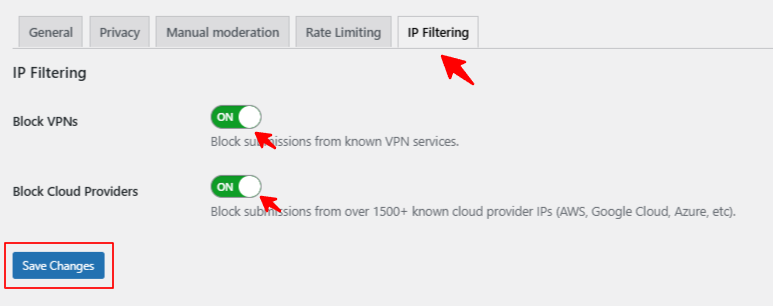
There you’ll see two key options:
- Block VPNs: Prevents submissions from known VPN IPs (use with care)
- Block Cloud Providers: Stops entries from 2,000+ data center IPs—highly recommended
Switch these on based on your needs, and click Save Changes. That’s it—your Contact Form 7 forms are now protected with IP-based spam filtering.
Tips for Effective Spam Protection in Contact Form 7
- If your visitors are global or remote, monitor how VPN blocking affects user access
- Review blocked submissions to ensure important messages aren’t accidentally filtered
- Use other OOPSpam tools like country-based blocking, language filtering, or rate limiting to build a layered anti-spam system
Final Thoughts
Spambots aren’t slowing down—but you don’t need to deal with endless fake submissions. With just a few clicks, OOPSpam gives you the power to stop spam from VPNs and data centers in Contact Form 7.
It’s fast. It’s lightweight. And it works in the background while you focus on what matters—growing your site and engaging real users.
Need help setting it up? OOPSpam supports other form plugins too, including Elementor Forms, Fluent Forms, and Gravity Forms. Just reach out and we’ll be happy to assist.