
Chazie Baniquid
Technical Content Marketer
7 minutes to read
How to Block VPN and Data Center IP Submissions in Elementor Forms

Spam form submissions are often routed through VPNs or cloud servers. If you’re seeing fake leads or suspicious traffic in your Elementor forms, these sources could be the cause. In this guide, we’ll cover why blocking them helps—and how to do it manually or with one click using the OOPSpam plugin.
Why Block VPN and Cloud Provider IPs in Elementor Forms?
Spammers are clever. They often use VPNs, proxies, or servers hosted by cloud providers to submit forms anonymously. This helps them:
- Avoid being blocked by country-based or IP filters
- Rotate identities quickly
- Automate spam submissions from powerful servers
Here’s where blocking VPNs and cloud providers helps reduce form spam significantly. But there’s a bit of nuance:
- Blocking VPNs: This can stop spam from people using anonymizing tools like Tor or commercial VPNs. But keep in mind, legitimate users (like remote workers or privacy-conscious visitors) might also use VPNs, so enabling this should be a thoughtful decision.
- Blocking Cloud Providers: Most spam and bot attacks come from data centers and cloud platforms (like AWS, Google Cloud, DigitalOcean). These IPs are rarely tied to actual users—so blocking them is a safer bet. If an IP falls under this category, it’s likely an automated program behind it, not a person.
While spam protection plugins typically check if an IP has a history of spam, blocking traffic from servers and data center IPs gives you an added layer of defense—even against IPs that haven’t been flagged yet. This helps catch new threats early, before they hit your inbox.
You can check if a specific IP belongs to a VPN provider or data center using tools like IP Reputation Check.
Method 1: Manually Blocking VPNs and Data Center IPs Using Cloudflare WAF
If you’re using Cloudflare for your site, you can set up rules to block traffic from VPN and data center networks manually. This approach can work, but it takes more effort to maintain.
How It Works
You’ll need to block traffic based on ASN (Autonomous System Numbers), which are identifiers assigned to networks like AWS, Linode, or VPN providers. These rules can help stop traffic from entire networks.
Example: If you notice spam traffic from DigitalOcean, you can block its ASN (AS14061) via Cloudflare’s firewall rules.
Limitations of Using Cloudflare WAF
- Manual maintenance: ASNs and IP addresses change. You’ll need to keep checking and updating them regularly.
- Possible false positives: Blocking by ASN may accidentally block real users, especially VPN users or businesses using cloud-hosted networks.
- Time-consuming: You’ll need to identify which providers are responsible for the spam, research their ASNs, and apply filters yourself.
So while this method works, it’s better suited to advanced users or those managing high-traffic sites with dedicated technical resources.
Method 2: Block VPN and Cloud IPs with One Click Using the OOPSpam WordPress Plugin

If you want a faster, more automated way to filter out these IPs in Elementor forms (or any supported form plugin), our OOPSpam WordPress plugin (that’s us 👋) makes it easy.
We’ve recently added two new toggles under IP Filtering:
- Block VPNs
- Block Cloud Providers
With one click, you can reduce spam from two major sources—without worrying about managing IP lists or ASN numbers.
What Makes This Work So Well?
We maintain an up-to-date, industry-standard IP database that includes:
- IPs from over 2,000+ data centers
- IP ranges used by known VPN and proxy services
- Continuous updates to reflect ownership changes and newly flagged IPs
This means your Elementor forms get accurate, real-time protection without breaking a sweat.
And if you’re using our API or other integrations beyond WordPress, these same protections are available there too.
How to Enable VPN and Cloud IP Blocking in OOPSpam WordPress Plugin
Setting this up takes just a few minutes. Here’s how to do it.
Step 1: Install or Update the Plugin
Head to your WordPress dashboard, search for OOPSpam Anti-Spam in the plugin directory, and install or update to the latest version.
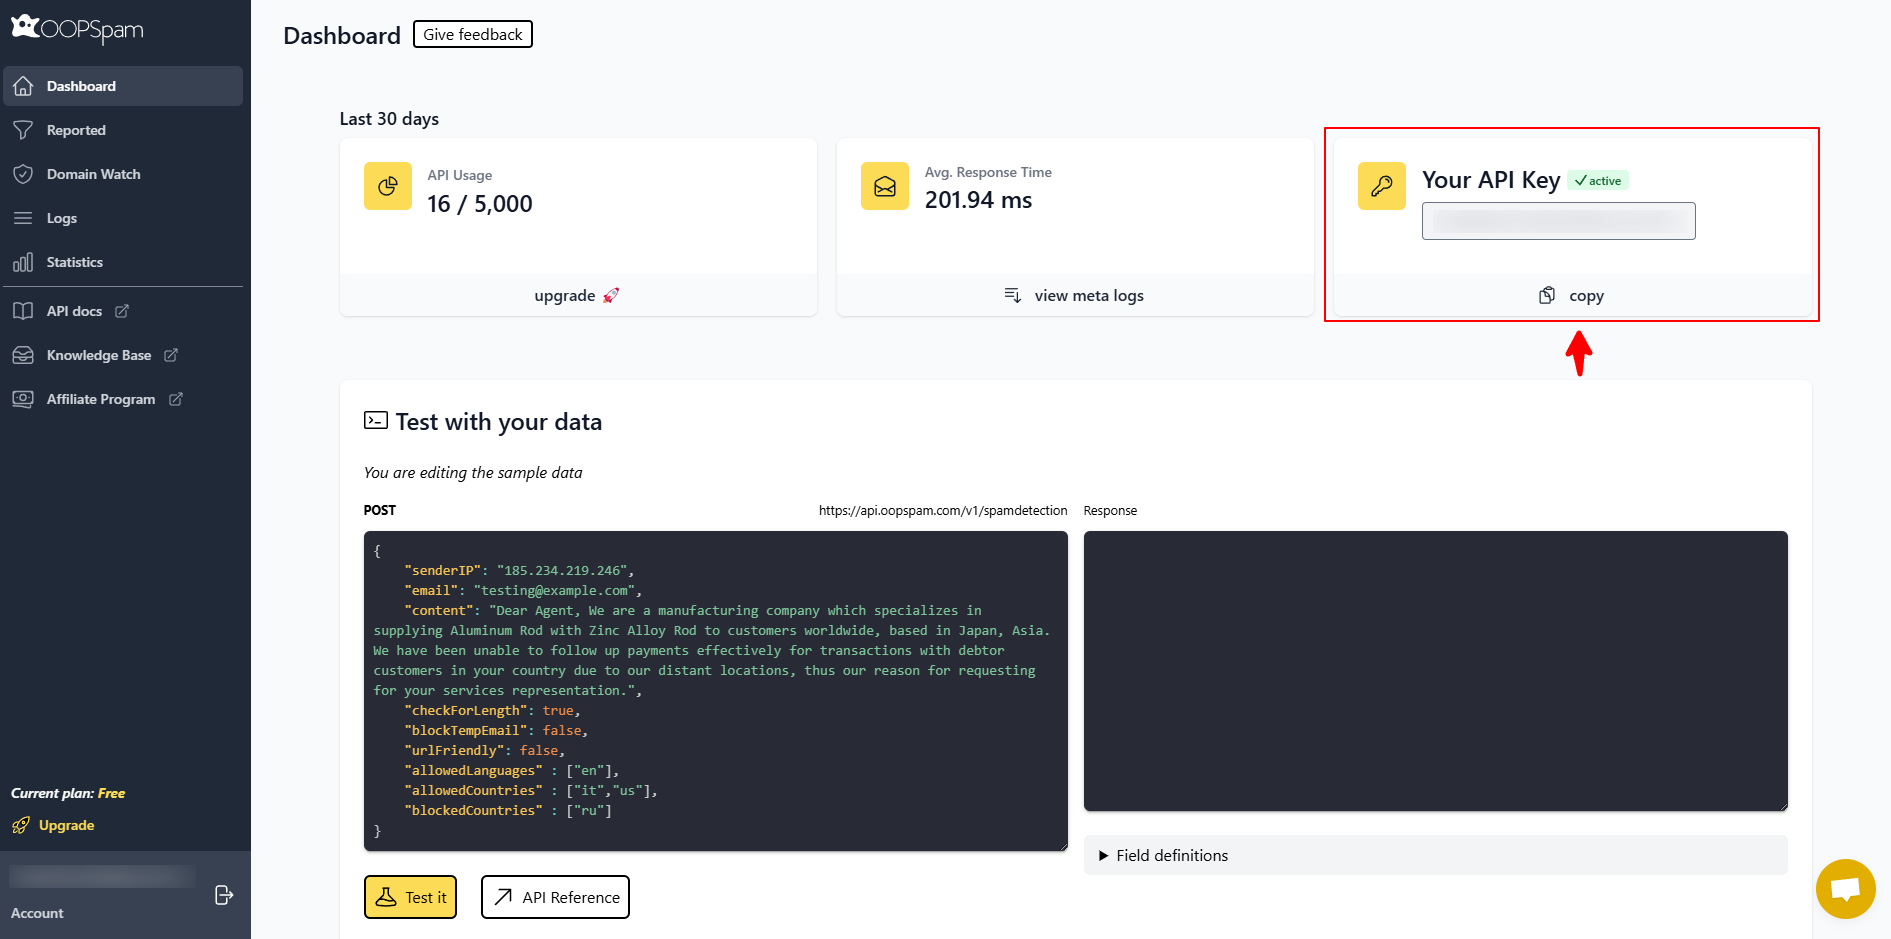
You’ll need an API key, which you can get by signing up on the OOPSpam Dashboard. Copy your API key and paste it into the plugin settings.
Step 2: Add Your API Key and Enable Elementor Spam Protection
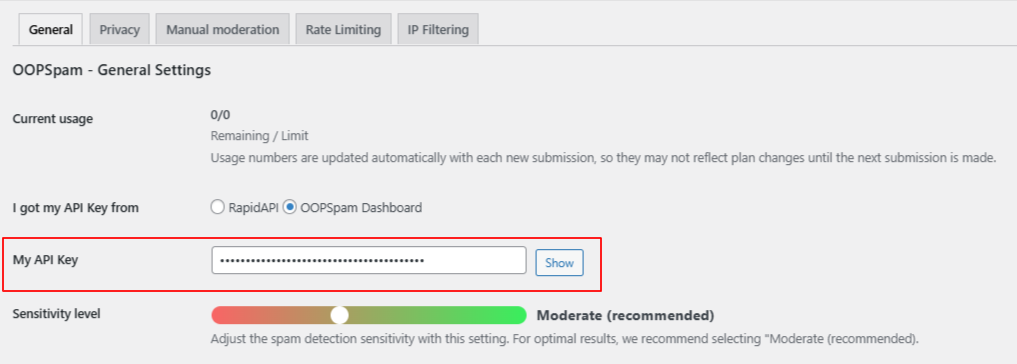
Go to Settings > OOPSpam Anti-Spam in your WordPress Admin. Under the General tab, select OOPSpam Dashboard as your source, and paste your API key into the “My API Key” field.
If you have Elementor installed, a special section labeled Elementor Forms will appear below.
- Toggle on Activate Spam Protection
- Optionally, enter a custom message that appears when a submission is flagged as spam

Step 3: Navigate to the IP Filtering Tab
Still in the plugin settings, click the IP Filtering tab. This is where you can control how the plugin handles spam based on IP origin.
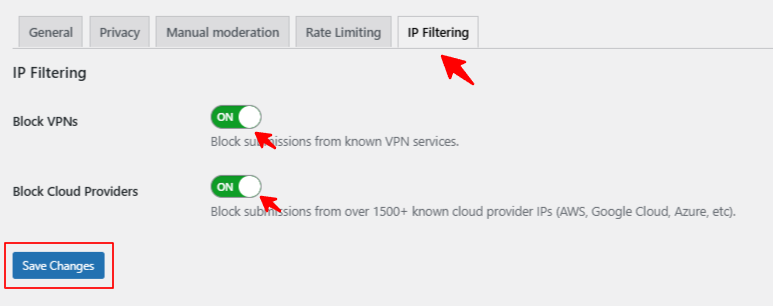
Here, you’ll find two key options:
- Block VPNs: Prevents form submissions from known VPN or proxy IPs (use with caution)
- Block Cloud Providers: Blocks IPs from over 2,000 data centers and cloud platforms—this is safer and recommended for most sites
Flip the toggles to turn them on based on your needs. Click the Save Changes button at the bottom of the page. Your Elementor forms are now protected.
No additional form changes are needed—OOPSpam works in the background, silently filtering based on IP reputation and data source.
Tips for Balancing Spam Protection and User Access
- If your audience includes global users, remote workers, or those in restricted regions, think carefully before blocking VPNs.
- Review your form submissions regularly for any false positives.
- Combine this with other filters in OOPSpam (like country or language blocking) for a layered defense.
Final thoughts
Spambots aren’t going anywhere, but you don’t need to spend hours chasing IP addresses to stay ahead. Whether you’re managing a contact form, lead gen, or newsletter sign-up on Elementor, these two settings give you quick control over a major source of spam.
If you’ve been overwhelmed by odd submissions from anonymous sources or server farms, try blocking VPN and cloud provider IPs using the OOPSpam plugin. It’s fast, reliable, and designed to work quietly in the background while you focus on growing your site.
Let us know if you’d like help with setup or want to explore how these features work with other form builders like Contact Form 7, WS Form, or Gravity Forms.